A well-insulated space isn’t just about comfort—it’s a smart investment. Many homeowners overlook their garages, but this area often acts as a major source of energy loss. Properly sealing and insulating it can transform an unstable environment into a functional workspace while cutting utility costs.
According to Bryan Sebring of Sebring Design Build, temperature regulation is key. Materials like fiberglass batts, spray foam, and rigid panels create barriers against heat transfer. This helps maintain consistent indoor conditions year-round, whether you’re storing tools or working on projects.
Beyond personal comfort, strategic upgrades can increase property value. Energy-efficient homes attract buyers, and minor improvements yield long-term savings. Even basic DIY projects make a measurable difference in reducing drafts and noise pollution.
Key Takeaways
- Reduces energy bills by minimizing heat exchange
- Enhances usability as a workshop or storage area
- Boosts home resale value through efficiency upgrades
- Common materials include fiberglass, foam, and rigid panels
- Professional guidance ensures optimal results
Ready to tackle your project? The following sections break down materials, installation steps, and cost-saving strategies. Let’s turn your garage into an asset, not an energy drain.
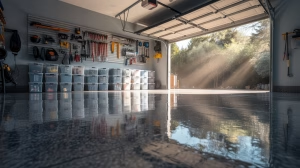
Introduction to Garage Insulation
Transforming your garage from a drafty storage area into a climate-controlled space offers more than just comfort—it reshapes how you use your home. Proper garage insulation prevents outdoor temperatures from seeping indoors, creating a stable environment for tools, vehicles, and hobbies. This upgrade also shields sensitive items like paints or electronics from humidity and extreme heat.
Homes with insulated garages use 10-15% less energy annually compared to those without, according to ENERGY STAR® data. By reducing heat transfer through walls and doors, your HVAC system works less intensely, lowering utility bills. The result? A versatile space that doubles as a workshop, gym, or storage zone without compromising indoor comfort.
Three core advantages make this project essential:
- Year-round temperature consistency for stored items
- Reduced strain on heating/cooling systems
- Added functional square footage to your property
| Insulation Type | Best For | Avg. R-Value |
|---|---|---|
| Fiberglass Batts | DIY wall installations | R-13 to R-15 |
| Spray Foam | Air gap sealing | R-6 per inch |
| Rigid Panels | Garage doors | R-4 to R-6.5 |
This guide explores material choices, safety protocols, and step-by-step installation methods. You’ll learn how to evaluate existing structures, select cost-effective solutions, and maintain your system for peak performance. Let’s build a foundation for your energy-efficient upgrade.
Understanding the Importance of Garage Insulation
Homeowners often underestimate how garage insulation impacts their entire property. By creating a thermal barrier, this upgrade addresses two critical factors: energy conservation and livability. Industry studies reveal insulated garages reduce adjacent room heat loss by up to 25%, making them pivotal for whole-home efficiency.
Energy Efficiency and Cost Savings
Heat naturally moves toward cooler areas—a process insulation disrupts. During winter, materials like fiberglass batts slow warmth from escaping into unheated spaces. In summer, they block external heat from penetrating interior zones. This dual-action regulation cuts HVAC runtime by 12-18%, according to Department of Energy findings.
Lower utility bills emerge as immediate benefits. A 2023 HomeAdvisor analysis shows homeowners save $150-$300 annually after insulating attached garages. Over a decade, these savings often surpass initial installation costs. Proper sealing also minimizes temperature fluctuations that strain HVAC components, extending system lifespan.
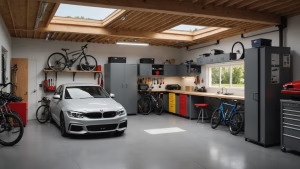
Enhanced Comfort and Versatility
Consistent conditions transform garages into functional extensions of living spaces. Woodworking tools won’t warp from humidity swings, while exercise equipment stays rust-free. Many families repurpose areas as home offices or playrooms once temperatures stabilize between 55-85°F year-round.
| Project Scope | Avg. Cost | Annual Savings |
|---|---|---|
| Basic DIY Wall Insulation | $400-$700 | $120 |
| Professional Full Garage | $1,200-$2,500 | $280 |
| Door + Weatherstripping | $200-$450 | $90 |
Realtors note insulated garages boost property values by 2-4% in competitive markets. Buyers increasingly prioritize energy-efficient features, viewing them as indicators of meticulous home maintenance. Whether pursuing savings or functionality, this upgrade delivers measurable returns.
tips for insulating garage
Maximizing your home’s efficiency starts with addressing overlooked spaces. A climate-regulated environment protects stored items and reduces energy waste. Homeowners ’ll need basic tools like measuring tapes, utility knives, and safety goggles to begin. Proper preparation ensures smooth execution.
Why Proper Insulation Matters
Inconsistent temperatures damage electronics, wooden furniture, and vehicles. Air leaks account for 30% of energy loss in attached structures, per EPA studies. Sealing gaps with weatherstripping and caulk prevents drafts while improving HVAC efficiency.
You’ll need these materials for most projects:
- Fiberglass batts (R-13 minimum)
- Expanding foam for cracks
- Vapor barrier sheeting
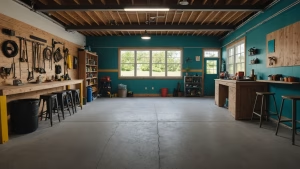
Key Benefits for Homeowners
Climate control extends beyond comfort. A well-sealed space cuts outdoor noise by 60%, creating quieter workshops. It also keeps garage temperatures stable—critical for preserving tools and seasonal decorations.
Follow this three-step guide for optimal results:
- Inspect walls and doors for existing damage
- Measure spaces to calculate material quantities
- Install layers sequentially (barrier first, then insulation)
Projects completed using a detailed guide show 40% fewer callbacks for repairs. Whether storing heirlooms or converting the area into a gym, strategic upgrades protect investments and enhance daily life.
Choosing the Right Insulation Materials
Selecting appropriate materials forms the foundation of any successful climate control project. Three primary types dominate residential applications: fiberglass batts, spray foam, and rigid panels. Each offers distinct thermal resistance properties measured by R-value—the higher the number, the better it blocks heat transfer.
Fiberglass Batts: Affordable and Accessible
Fiberglass remains popular for its low cost and DIY-friendly installation. Pre-cut batts fit standard wall cavities between studs, offering R-13 to R-15 ratings. However, improper placement can create gaps that reduce effectiveness. Always wear protective gear when handling this material to avoid skin irritation.
Spray Foam vs. Rigid Panels
Closed-cell spray foam provides superior air sealing with R-6 per inch—ideal for irregular spaces. Rigid panels (R-4 to R-6.5) work best on garage doors and concrete surfaces. Consider these factors when comparing:
- Climate zone requirements (check local building codes)
- Moisture resistance needs
- Long-term durability expectations
| Material | Avg. Cost/sq.ft | Install Difficulty |
|---|---|---|
| Fiberglass | $0.50-$1.20 | Low |
| Spray Foam | $1.50-$3.00 | High |
| Rigid Panels | $0.70-$1.50 | Medium |
Spray foam expands up to 100x its liquid volume, filling cracks other types miss. For colder regions, prioritize higher R-values even if costs rise slightly. Proper material selection ensures energy savings outweigh upfront investments over time.
Preparation and Safety for Insulating Your Garage
Proper groundwork sets the stage for efficient installation. Before handling materials, clear the workspace and gather all required equipment. This minimizes interruptions and ensures smooth progress during the project.
Tools and Protective Gear
Start by assembling these essentials:
- Staple gun for securing vapor barriers
- Galvanized screws to anchor rigid panels
- Insulation kit containing pre-cut batts
- Heavy-duty gloves and N95 masks
Wear long sleeves and safety goggles when handling fiberglass. Tiny particles can irritate skin and lungs. Keep a vacuum nearby to clean debris immediately after cutting materials.
| Tool | Purpose | Safety Tip |
|---|---|---|
| Staple Gun | Attach barriers to studs | Keep fingers clear of ejection area |
| Utility Knife | Trim insulation batts | Retract blade when not in use |
| Caulk Gun | Seal window gaps | Wear gloves to prevent skin contact |
Remove vehicles, shelves, and hanging items from walls. Sweep floors to eliminate dust that could compromise adhesive bonds. Label electrical outlets with painter’s tape before covering them with insulation.
Organize supplies in labeled bins for easy access. Double-check measurements against your insulation kit contents. Missing staples or incorrect screw sizes can delay completion by hours.
Step-by-Step Installation Guide
A methodical approach transforms garage upgrades from daunting to achievable. Start by organizing tools like utility knives, measuring tapes, and expanding foam cans. Proper preparation prevents wasted time and ensures materials fit snugly against structural elements.

Clearing Walls and Preparing Surfaces
- Remove wall-mounted items (shelves, hooks) using a pry bar
- Vacuum dust from stud cavities with a shop vac
- Check for protruding nails or screws; hammer them flush
Expose at least 6 inches around each stud for unobstructed access. Wear gloves when handling old insulation to avoid skin irritation from degraded materials.
Sealing Gaps with Expanding Foam
Identify air leaks using incense sticks—watch for smoke movement near electrical outlets and window frames. Apply foam in 3-inch sections, allowing 15 minutes between layers for expansion.
| Gap Size | Foam Type | Cure Time |
|---|---|---|
| Under 1/4″ | Minimal Expansion | 2 hours |
| 1/4″-1″ | Standard | 4 hours |
| Over 1″ | High-Yield | 8 hours |
Trim cured foam with a serrated knife for smooth surfaces. Always test spray on cardboard first—different brands vary in expansion rates. This prevents over-application that could warp door frames.
Measure wall cavities twice before cutting batts. Add 1/2 inch to width measurements for friction-fit placement. Stagger seams between layers to eliminate thermal bridging points.
Insulating Garage Walls and Ceilings
Properly finishing walls and ceilings requires attention to both thermal barriers and surface materials. Fiberglass batts nestle between studs to block heat transfer, while drywall creates a protective layer that enhances fire resistance. This combination transforms unfinished spaces into energy-efficient zones with a polished appearance.
Securing Thermal Barriers and Surface Layers
Start by pressing batts firmly into wall cavities, ensuring no compression. Gaps reduce effectiveness—trim edges with a utility knife for precise fits. For ceilings, use ladder supports to hold materials in place during installation.
When attaching drywall, measure panels 1/8″ smaller than the space to allow for expansion. Secure sheets horizontally using 1-5/8″ screws every 12 inches. Stagger seams between panels to prevent weak points and improve structural integrity.
| Drywall Thickness | Weight Capacity | Fire Rating |
|---|---|---|
| 1/2″ | 40 lbs/sheet | 30 minutes |
| 5/8″ | 55 lbs/sheet | 1 hour |
Key tools for clean results:
- Rotary cutter for curved edges
- T-square for straight lines
- Drywall lift for ceiling installations
Fire-resistant drywall (Type X) adds critical safety benefits. Its gypsum core delays flame spread, buying time during emergencies. Always seal joints with fiberglass tape before applying compound—this prevents cracks from temperature shifts.
For ceilings, professionals recommend two-person teams. Heavy panels demand careful handling to avoid sagging. Double-layer installations in moisture-prone areas provide extra protection against humidity damage.
How to Insulate a Garage Door
Garage doors demand specialized strategies due to their constant motion and direct exposure to outdoor elements. Unlike static walls, these surfaces flex during operation, requiring materials that won’t crack or detach over time. Proper thermal barriers here prevent cold spots and reduce noise from street traffic.
Techniques for Different Door Types
Steel panels benefit from rigid foam boards cut to fit raised sections. Adhesive-backed kits simplify installation—press panels into recessed areas and trim excess with a utility knife. Wood-frame doors handle fiberglass batts secured with staples, while flat-panel designs need flexible radiant barriers that contour smoothly.
| Door Type | Material | Installation Tip |
|---|---|---|
| Steel | Rigid foam boards | Use double-sided tape for vibration resistance |
| Wood Frame | Fiberglass batts | Seal edges with foil tape |
| Flat Panel | Reflective bubble wrap | Overlap seams by 2 inches |
Adjusting Mechanisms for Added Weight
Insulation adds 10-15 pounds per panel, straining existing springs. Test balance by disconnecting the opener and manually lifting the door halfway—if it stays put, tension is correct. If not, adjust spring coils incrementally using winding bars. Never attempt this without proper tools—improper adjustments can cause dangerous snapbacks.
Manufacturers like Clopay recommend professional servicing when adding thermal layers. Upgraded torsion springs or reinforced tracks often become necessary for safe, smooth operation. Always consult door specifications before modifying components.
Comparing Insulation Types and R-Value Considerations
Choosing effective insulation involves balancing thermal performance with practical needs. Different materials excel in specific climates and workspace setups. Let’s examine how popular options stack up in real-world conditions.
Pros and Cons of Popular Materials
Fiberglass batts remain a budget-friendly choice for moderate climates. With R-13 to R-15 ratings, they handle mild winters but struggle in extreme summer heat. Spray foam’s higher R-6 per inch seals air gaps better, ideal for humid regions.
| Material | Winter R-Value | Summer Efficiency | Noise Reduction |
|---|---|---|---|
| Fiberglass | R-13 | Fair | Moderate |
| Spray Foam | R-18 (3″) | Excellent | High |
| Rigid Panels | R-10 | Good | Low |
In colder areas, spray foam prevents ice dams but costs 3x more than fiberglass. Rigid panels work well for garage doors—their moisture resistance suits rainy climates. Consider your primary workspace use: projects needing quiet benefit from foam’s sound-blocking properties.
Energy Star® notes R-values below 10 waste 22% more heat in northern states. For southern zones, prioritize materials with reflective surfaces to repel summer radiation. The right choice transforms your area into a year-round asset without overspending.
Cost Considerations and DIY Savings
Smart budgeting transforms climate control projects from expensive upgrades to value-driven improvements. Homeowners can expect to spend $0.50-$3.00 per square foot depending on material choices and labor. Strategic planning helps allocate funds where they deliver maximum returns.
Balancing Material and Labor Expenses
Fiberglass batts offer the lowest upfront cost at $0.50-$1.20 per square foot, while spray foam averages $1.50-$3.00. Consider this breakdown for common approaches:
| Method | Material Cost | Time Required |
|---|---|---|
| DIY Walls Only | $400-$700 | 8-12 hours |
| Professional Full Install | $1,200-$2,500 | 1-2 days |
| Door Insulation Kit | $150-$300 | 3-5 hours |
“DIYers save 40-60% on labor costs by handling installations themselves,” notes a 2023 DIY Home Insulation Guide. Proper tool selection—like a heavy-duty staple gun for vapor barriers—reduces errors that require professional fixes.
Maximizing Efficiency in Every Step
Organize tasks to use time effectively. Pre-cut materials during planning phases, and group similar activities like sealing gaps before installing batts. Allocate specific spaces for tools to avoid delays searching for items mid-project.
Key strategies include:
- Purchasing 10% extra materials to account for measurement errors
- Scheduling work during mild weather to avoid HVAC strain
- Reusing leftover insulation for small gaps around windows
While initial investments vary, properly insulated spaces cut heating/cooling costs by 12-18% annually. This creates a payback period of 3-7 years—faster than most home upgrades. Focus on quality staples and adhesives to ensure longevity without repeat expenses.
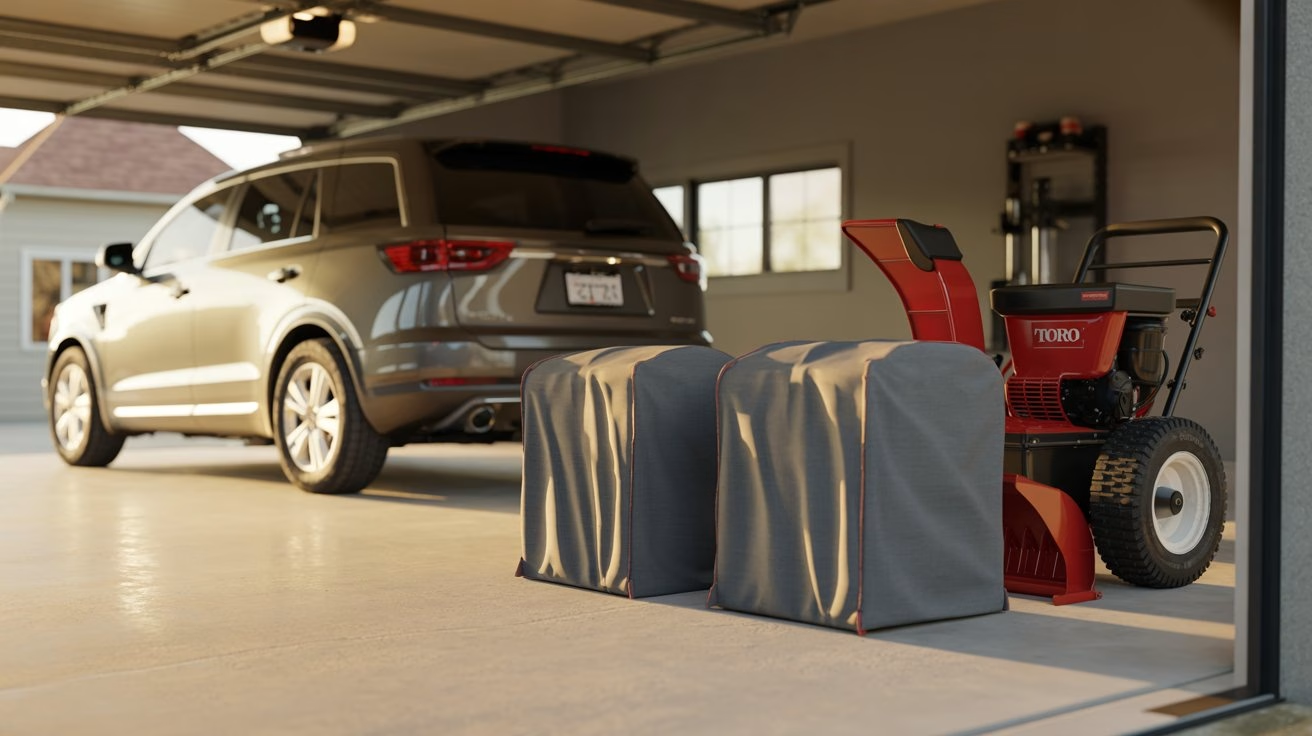
Maintaining Your Garage Insulation for Long-Term Efficiency
Preserving your insulation’s performance requires consistent care. Over time, shifting materials and environmental factors can reduce effectiveness. Routine checks help catch minor issues before they escalate into expensive repairs.
Regular Inspections and Upkeep
Check walls and ceilings quarterly for compression or gaps near studs. Use a flashlight to spot discoloration indicating moisture buildup. Pay attention to corners where mold often starts growing unnoticed.
Inspect garage doors seasonally. Temperature changes cause adhesives to weaken, letting panels separate. Reattach loose insulation promptly to prevent thermal bridging. For studs, ensure fasteners remain secure—tighten any loose screws with a drill.
| Area | Checklist Item | Frequency |
|---|---|---|
| Walls | Gaps near studs | Every 3 months |
| Ceiling | Sagging batts | Twice yearly |
| Doors | Panel alignment | Seasonally |
Prevent mold by controlling humidity below 50%. Install a hygrometer and use dehumidifiers during rainy months. Clean surfaces with vinegar solutions to kill spores without damaging materials.
For ceilings, vacuum dust from exposed insulation using a brush attachment. Replace discolored batts immediately—compromised materials lose R-value quickly. Seal small tears in vapor barriers with foil tape.
Schedule professional assessments every 2-3 years. Experts use thermal cameras to detect hidden air leaks around studs and electrical outlets. This proactive approach maintains energy savings and extends your system’s lifespan.
Conclusion
Choosing the right type of insulation transforms your garage area from wasted space into a climate-controlled asset. Proper material selection maximizes energy savings while creating functional zones for hobbies or storage. On the financial side, this upgrade cuts utility bills and boosts property appeal through improved efficiency.
From fiberglass batts to rigid panels, each insulation type serves distinct needs. Strategic installation preserves wall space and prevents thermal gaps. Remember: sealing air leaks comes first, followed by layered material placement. These steps ensure lasting protection against temperature swings.
Your transformed space becomes more than parking real estate—it’s an extension of your living area. Whether creating a workshop or protecting seasonal items, the right panel type maintains ideal conditions year-round. Consider maintenance requirements and local climate when finalizing plans.
Every successful project balances cost, space optimization, and long-term performance. Review this guide’s insights on the environmental side of insulation before starting. With careful planning, your upgraded garage becomes a comfortable, value-adding workspace that serves multiple needs.