Embarking on a garage construction project requires meticulous planning and a careful budget. Over 70% of home buyers seek this feature, highlighting its value. However, local codes often dictate yard-size restrictions, varying by area.
Effective planning can help manage costs, fluctuating between $10,000 and $40,000. Researching the garage building process in advance is crucial. It allows you to explore foundation options, measure layout needs, and refine your design for durability.
Whether your goal is to store classic cars or create additional workspace, a systematic approach minimizes surprises. Ensure a detailed plan for each phase, from initial measurements to the final touches.
Key Takeaways
- Check local rules for lot usage and limits.
- Plan around height requirements to keep the build proportional.
- Budget for foundation work, such as slabs or footings.
- Secure tools and materials to handle framing needs.
- Consult reliable sources for cost estimates and scheduling.
- Invest time in a thorough plan to avoid delays.
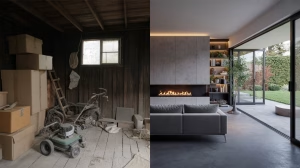
Assessing Your Needs and Requirements
Figuring out the ideal garage size requires clearly understanding its intended use. Some homeowners seek extra storage or a workshop area. Others need a space for one vehicle. A one-car garage usually starts at 14 feet wide by 20 feet long, offering about 280 square feet for parking.
The minimum size for those with two cars is 22 feet wide by 24 feet long, providing around 528 square feet. Consider extra items like lawn tools, bikes, or a workbench. It’s also crucial to check your property lines for enough space and to account for slopes and trees that could affect placement and cost.
Choosing between an attached or detached garage depends on your convenience needs and your home’s current design. An attached garage offers easy access, while a detached one might be easier to expand. A detailed assessment of your needs and available space is essential for a successful garage construction project.
Understanding Local Building Codes
Before embarking on a garage construction project, it’s crucial to understand the local regulations. Hillsborough County in Florida scrutinizes eight critical areas, including building and electrical standards. This ensures every aspect of the project adheres to the necessary guidelines. Specifically, Ordinance 87-6 (amended by 89-5) mandates the display of a visible address number. The Florida Building Code, meanwhile, tailors national standards to suit local conditions.
Ignoring these regulations can lead to hefty fines or significant delays in your project. It’s essential to navigate these requirements carefully to avoid such issues.
Permits typically cover design, height restrictions, and flood risk assessments. Hillsborough County’s Construction Code combines the 2014 Florida Building Code with federal regulations. The Land Development Code, on the other hand, oversees zoning and site enhancements. A quick call to your local planning office can clarify setbacks, utility needs, and other critical details.
Adhering to these regulations ensures your garage meets all safety standards. This lets you focus on the construction process without worrying about compliance issues. Below is a quick overview of the areas under review:
| Area | Key Focus |
|---|---|
| Building | Structural integrity and materials |
| Electrical | Wiring, circuits, and GFCI protection |
| Gas | Safe piping and ventilation |
| Mechanical | HVAC and air circulation |
| Plumbing | Drainage, water supply, and vents |
| Land Use | Property lines and lot coverage |
| Zoning | Setback distances and usage rules |
| Flood Damage Control | Protective measures in high-risk zones |
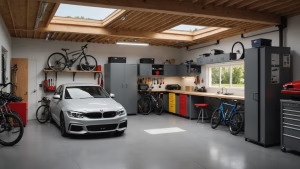
Designing Your Garage Layout
Effective planning is key to creating a garage that meets your daily needs and future aspirations. Start by mapping out the driveway flow, pedestrian paths, and access points. This ensures vehicles, tools, and supplies move smoothly without congestion. Remember, an 8-ft. garage door requires walls at least one foot taller for proper overhead clearance.
Reserving space for storage or a workshop is crucial. Adequate interior space allows for tall garden equipment or parking multiple cars. A well-designed garage guide should include features like windows and a utility sink. Architects or contractors can help ensure your design meets technical and structural requirements.
While larger garages may cost higher, typical projects range from $16,500 to $40,000. Below is a comparison of different garage sizes and their estimated budgets:
| Garage Size | Recommended Dimensions | Approx. Cost ($) |
|---|---|---|
| Single-Car | 14 ft. x 20 ft. | 20,000 |
| Two-Car | 20 ft. x 24 ft. | 30,000 |
| Three-Car | 30 ft. x 24 ft. | 40,500 |
Selecting the Right Materials
Choosing between wood, steel, concrete, or brick is a critical step in garage construction. Each material impacts durability, upkeep, and cost. Wood is popular for its simplicity in installation. Steel, on the other hand, offers resistance to warping, ensuring strength against various weather conditions. Brick and concrete provide a solid exterior but may necessitate more specialized labor.
When it comes to roofing, options range from asphalt shingles to tile. Selecting a roofing material that complements your home’s roof can enhance the overall aesthetic. Proper insulation is essential for storing valuable items or running equipment. It can significantly reduce energy costs and protect your belongings throughout the year. Over 70% of home buyers seek homes with garages, making durable materials a wise investment for resale value.
| Material | Pros | Cons |
|---|---|---|
| Wood | Easy to assemble, natural appearance | More upkeep, can be vulnerable to moisture |
| Steel | High strength, minimal warping | Higher cost, needs specialized tools |
| Brick | Classic style, strong exterior | Heavier, raises labor expenses |
| Concrete | Fire-resistant, robust walls | Susceptible to cracking over time |
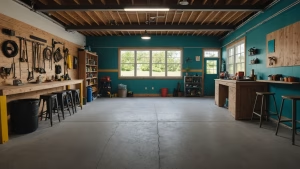
Preparing the Site
Over 70% of home buyers prefer a house with a garage. This preference highlights the importance of proper site preparation for any DIY garage construction project. Start by clearing the area of debris, unwanted vegetation, and any remnants of previous structures. Be cautious of buried pipes or roots, as neglecting these can result in costly repairs later on.
Ensuring soil stability is crucial. Compact and level the ground to prevent water from pooling around your garage. A plate compactor can help achieve a firmer base, while gravel improves drainage. Remember, some cities require an additional permit for demolition, so verify local regulations before commencing.
Proper site preparation is the foundation for a successful DIY garage construction. Conducting surveys with utility companies can help avoid hitting underground lines, saving both time and money. By dedicating time to site work, you ensure the long-term stability and value of your garage.
Below is a quick overview of core tasks you might tackle:
| Task | Purpose |
|---|---|
| Debris Removal | Clear space for a stable base |
| Identify Hazards | Avoid damaging utility lines |
| Level Ground | Prevent water accumulation |
| Compact Soil | Reinforce stability for the slab |
Laying the Foundation
Creating a solid base is crucial when starting a garage project. Over 70% of home buyers seek a house with a garage, highlighting its importance. Begin by setting stakes and string around the perimeter, ensuring each corner is perfectly level. Inside the forms, add rebar or wire mesh to strengthen the concrete. This step helps prevent cracks or shifts in the future.
Mix and pour the concrete carefully, then smooth it with a screed. It’s vital to shield the slab from sunlight and moisture during the curing process, which takes about a week. This initial phase is key to building a durable structure, aligning with the average $28,000 investment. Repairing a fresh foundation can cost between $250 to $800, so allowing the slab to harden is crucial to avoid expensive repairs.

Here’s a quick guide to common foundation types and their curing times:
| Type of Foundation | Cure Duration | Potential Repair Cost |
|---|---|---|
| Concrete Slab | Up to 1 Week | $250–$800 for minor cracks |
| Basement | 2–4 Weeks | $2,300–$7,300 for leaks |
| Crawl Space | 2–3 Weeks | $600–$3,000 for sinking issues |
Building the Frame
Over 70% of home buyers prefer a house with a garage. Framing is crucial, setting the stage for all future elements. Start by marking sill plates on the slab and then secure vertical studs at regular intervals. This creates a solid foundation. Reinforce door and window openings to handle the weight of the garage door and hardware.
Roof trusses can be built on-site or ordered pre-made. Pre-fabricated storage trusses cost about 30% more but are easier to install. It’s essential to maintain consistent measurements to avoid issues with siding or insulation. These tips ensure accurate placement of studs, plates, and trusses, preventing future problems.
Below is a concise look at two common framing materials:
Pay close attention to alignment and adhere to your blueprint. This meticulous approach will create a stable, enduring framework for your garage.
Installing the Roof
Securing the roof is crucial for protecting your new garage from harsh weather. Ensure trusses or rafters are correctly aligned. Then, install decking made from plywood or OSB across the top. Each panel must have H-clips for stability and to prevent flexing. This step is key to your garage construction timeline, so order supplies well in advance.
Next, apply a waterproof underlayment over the decking to prevent moisture intrusion. Make sure to overlap seams for a tight seal. For cost-effective coverage, asphalt shingles are a good choice. Metal panels offer added durability. Flashing around vent pipes and edges directs water away, enhancing roof longevity.
Prefabricated trusses can take two to four weeks to arrive, impacting your schedule. Storage trusses, which provide extra space, are about 30% more expensive. Remember, good ventilation is essential. Use ridge vents or soffit vents to keep the attic dry. Proper planning and efficient coordination can expedite your garage’s completion, bringing you closer to a fully enclosed structure.
Electrical and Plumbing Installations
Electrical and plumbing installations in a garage need careful planning to meet local guidelines. Proper wiring is crucial for a functional workspace. Many owners add multiple dedicated circuits for tools like welders or compressors. Overhead fixtures provide general illumination, while focused lighting near workbenches aids in precise tasks.
A moderate project complexity and cost between $101 and $250 match the typical timeline of a few days. For a 15-amp line, the continuous load limit is 1,440 watts, and a 20-amp line supports up to 1,920 watts. Most local codes require 14-gauge wire on 15-amp circuits and 12-gauge wire on 20-amp circuits.
Upgrading plumbing in a detached garage can boost property value by up to 20%. PVC is the most common choice, with around 60% of residential plumbing projects. PEX covers about 20% and often works well for hot water lines. Local codes vary by up to 30%, so checking regulations is key.
Costs range from $1,000 to $5,000, influenced by factors like labor rates and permit requirements. Annual inspections can cut emergency repairs by up to 40%, reflecting the worth of routine care.
Below is a quick reference for material usage:
| Material | Market Share | Key Benefit |
|---|---|---|
| PVC | 60% | Long-Lasting and Affordable |
| PEX | 20% | Flexible for Hot Water Needs |
| Copper | N/A | Eco-Friendly with Reduced Waste |
Insulation and Drywall Installation

In the United States, many garages lack the insulation they need, leading to increased energy costs. Fiberglass batts are a common choice, priced between $0.30 and $1.50 per square foot. On the other hand, spray foam offers a tighter seal, but its cost can reach up to $3.80 per square foot. The total cost can vary widely, depending on the garage’s size and whether you choose to do the installation yourself or hire a professional.
Local building codes often require fire-rated drywall for garages connected to the main home. Properly taping seams and applying joint compound can significantly reduce air leaks and protect items from humidity. Drywall not only enhances the interior but also increases the property’s value. In areas like Northeastern Pennsylvania, moisture-resistant finishes are essential. A well-installed drywall system ensures the safety and comfort of your belongings.
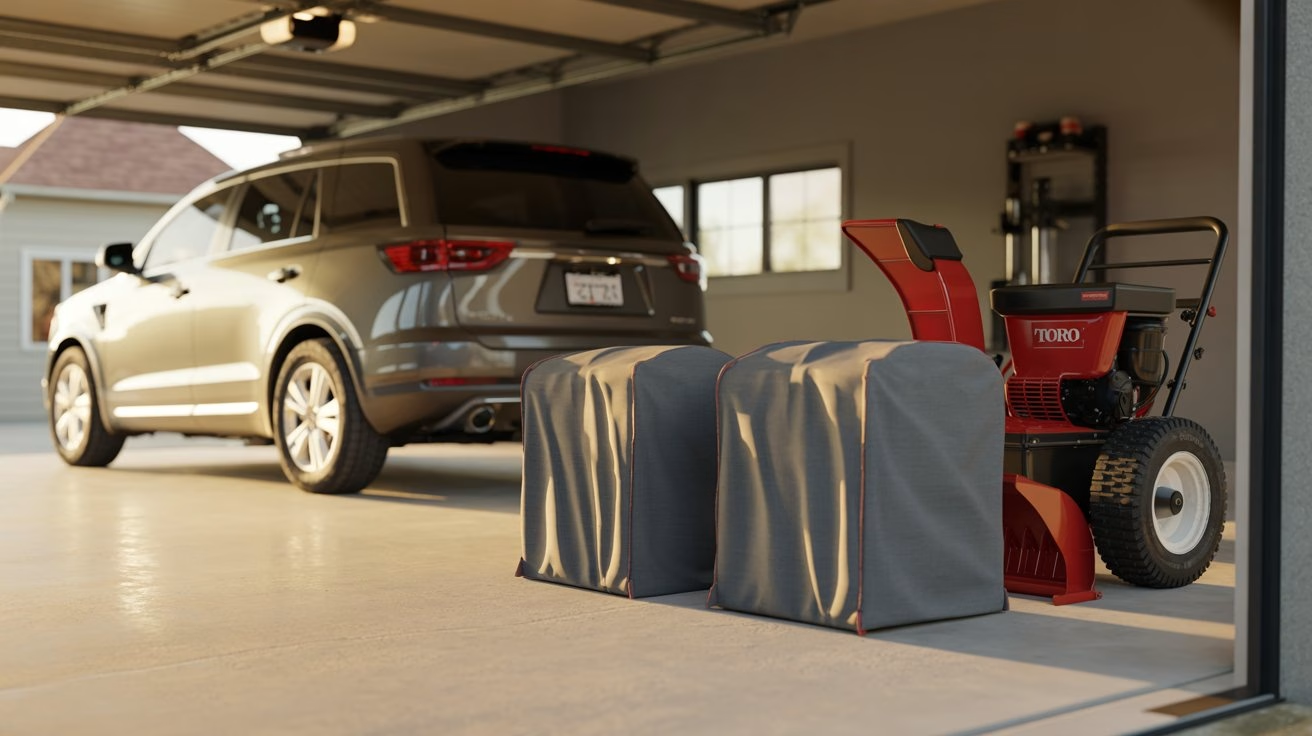
Final Touches and Cleaning Up
Many homeowners choose light-reflecting paint from Sherwin-Williams to unify walls and ceiling. This step helps define the interior, preventing it from feeling dark. For a durable surface, some use an epoxy floor coating by Rust-Oleum. It protects against spills and dents, enhancing the overall appeal.
Adding permanent shelving or overhead racks provides functional storage for tools, boxes, and seasonal items. Working with tested brands ensures these organizers are stable. Conduct a final inspection of electrical elements and plumbing lines. Confirm each fixture is secure and working correctly. Ensure enough clearance for safe movement of larger items like a riding mower or workshop bench.
Over 70% of home buyers prefer a house with a garage. This final stage can significantly increase property value by making the structure look neat and fresh. Test your garage door for smooth operation and responsive safety sensors. Once it operates without hesitation, your garage is ready for long-term use.
Source Links
- 10 Tips for Framing a Garage – https://www.familyhandyman.com/list/tips-for-framing-a-garage/?srsltid=AfmBOop5wro1pzo_jak2vdEPmRlfTM3IJqVGC9KyOCmlvtCgxa5LF2zv
- How To Build a Garage From Scratch: The Full 9-Step Guide – https://alansfactoryoutlet.com/blog/how-to-build-a-garage/?srsltid=AfmBOooKT4vHNB63qZ8wDK1wL1N0JfgrKodMkHIfHZfNUdIAgFamLSft
- Building a Garage: What Are the Key Project Steps? – https://renoquotes.com/en/blog/building-your-garage
- Custom Garage Project: 7 Vital Steps to Kickstart Your Dream Build – https://www.michaelnashkitchens.com/custom-garage-project-7-vital-steps/
- A Step-by-Step Guide – Arizona Garage Builders – https://arizonagaragebuilders.com/building-a-2-car-garage-a-step-by-step-guide/
- Construction Codes & Ordinances – https://hcfl.gov/businesses/permits-and-records/permitting-tools/construction-codes-and-ordinances
- Garage Building Code Requirements You Need to Know – Trusscore – https://trusscore.com/blog/garage-building-code-requirements-you-need-to-know.html
- Here is How to Build a Garage from the Ground Up on a Shoestring Budget – A1 Garage Door Service – https://a1garage.com/here-is-how-to-build-a-garage-from-the-ground-up-on-a-shoestring-budget/
- Pro Tips for Planning Your Dream Garage – https://www.familyhandyman.com/list/pro-tips-for-planning-your-dream-garage/?srsltid=AfmBOoqkZNbB-INRa0QjQkhkYS_DHEar2GZdvFKwgf-XlgFIejlX4_UI
- How To Build a Garage From Scratch: The Full 9-Step Guide – https://alansfactoryoutlet.com/blog/how-to-build-a-garage/?srsltid=AfmBOopTiwVkES4wp8tGbulkGTXserymvnhJ3XQEVVhjHe1lmbFGSNiT
- 10 Tips for Framing a Garage – https://www.familyhandyman.com/list/tips-for-framing-a-garage/?srsltid=AfmBOory20pAs5tQO1qKtFXO1_QffbnYwl7sr23b34pCpFO5B8-tS5L8
- Tips for Building Your Own Garage – https://www.absolutesteeltx.com/tips-for-building-your-garage/
- How To Build a Garage From Scratch: The Full 9-Step Guide – https://alansfactoryoutlet.com/blog/how-to-build-a-garage/?srsltid=AfmBOoqCe53FxrQuocGcf_RPwFMx6ctTibibboCMF_vTxY_EuNHSa-Ij
- Building a Garage on a Budget – Tips & Tricks – https://jandnstructures.com/blog/project-planning/building-a-garage-on-a-budget/
- How To Build a Garage From Scratch: The Full 9-Step Guide – https://alansfactoryoutlet.com/blog/how-to-build-a-garage/?srsltid=AfmBOoqpSvnv7Ns6o1q26DX_vR1x94QxtjrfGmTHYX8qrmsIsfcE4OGf
- How To Lay a Foundation – https://www.thisoldhouse.com/foundations/reviews/how-to-lay-foundation
- How to Build a Concrete Pad for Your Garage | Sheds Unlimited – https://shedsunlimited.net/content/how-to-build-a-concrete-pad-for-your-garage/?srsltid=AfmBOoqDTam7buf0i5PMKsI7HTEpW-p9F9ZHleraN0daQaz_Nxb3hpfs
- How To Build a Garage From Scratch: The Full 9-Step Guide – https://alansfactoryoutlet.com/blog/how-to-build-a-garage/?srsltid=AfmBOoo2I5jKaQqjrZM1nd5lJXxBrmt-GoNe3MZefSUbiIJmMtUz7QmW
- 10 Tips for Framing a Garage – https://www.familyhandyman.com/list/tips-for-framing-a-garage/?srsltid=AfmBOopLOSMnqGfwSGYmCqiWwf3fMxzcQlDLJIMViHGVcNoG4RBLSGRY
- 10 Tips for Framing a Garage – https://www.familyhandyman.com/list/tips-for-framing-a-garage/?srsltid=AfmBOorTux7rOTAF4BF6F9vSjOhZZPCBKJKgClftfkZamy-jk0P4S7nq
- The Step By Step Guide To Building A Pole Barn | CMT Components – https://cmtcomponents.com/blog/step-by-step-guide-to-building-a-pole-barn/
- How to Run Plumbing to a Detached Garage: What to Know? – https://www.birkesbuilders.com/blog/all/how-to-run-plumbing-to-a-detached-garage
- DIY Guide to Adding Outlets & Conduits To Your Garage – https://www.familyhandyman.com/project/how-to-wire-a-finished-garage/?srsltid=AfmBOopZK9_TrUdJdZSCsuAQWQcHmfvwngt9mjhkHssKd8OoU5PQ4SFN
- 10 Tips for Framing a Garage – https://www.familyhandyman.com/list/tips-for-framing-a-garage/?srsltid=AfmBOorxeriRDnnQqba51yrt9KMIt1MLoUgdDHqnxyWnZEVFAjyl83gU
- How to Insulate a Garage [Step by Step] – https://alansfactoryoutlet.com/blog/garage-insulation-guide/?srsltid=AfmBOopaxvvWnmqWQD_yEwHCVQOLxyC_TxtbF135Rr9l7NX-0LeUl-AI
- How to Insulate Your NEPA Garage: Energy Expert Guide | EnergySmart – https://nepaenergysmart.com/how-to-insulate-your-nepa-garage-energy-expert-guide
- How To Build a Garage From Scratch: The Full 9-Step Guide – https://alansfactoryoutlet.com/blog/how-to-build-a-garage/?srsltid=AfmBOorxTsXUFwffjeEofSO_vxDNShjFy1pWCVY4eLecEp93JuI3L7Q3
- 10 Tips for Framing a Garage – https://www.familyhandyman.com/list/tips-for-framing-a-garage/?srsltid=AfmBOoojRE-NrfwAkZmHZKYZQtPKsh59lnrWzeMYleJmij_ZRY3iEKM7