The garage door, a monumental piece of machinery in our daily lives, is often taken for granted. We press a button, it rises, and we drive on. This seamless operation, however, masks a complex system of interconnected parts, each susceptible to wear and tear. Over time, the silent, smooth hum of a well-maintained door can devolve into a chorus of creaks, groans, and rattles. Ignoring these subtle—and not-so-subtle—warnings is a costly mistake. A small squeak today can signal a minor issue, but if left unaddressed, it can quickly escalate into a catastrophic failure, leaving you with a broken door, a hefty repair bill, or worse—a dangerous safety hazard.
This comprehensive guide is designed to empower you, the homeowner, with the knowledge to recognize these warning signs, perform simple preventative maintenance, and understand when to call in the professionals. By treating your garage door with the proactive care it deserves, you can extend its life, ensure its safety, and save yourself from future headaches and expenses.
The Symphony of Warning Signs: Decoding Your Door’s Language
Your garage door speaks to you through sound. The rhythmic hum of the opener and the quiet click of the rollers on the track are normal, but any deviation from this baseline is a call for attention. Learning to distinguish between harmless noise and a genuine problem is the first step in effective maintenance.
- Squeaking or Screeching: This is the most common sound and, thankfully, often the easiest to fix. A high-pitched squeak or screech typically means metal-on-metal friction. It’s a telltale sign that hinges, rollers, or springs are not properly lubricated. However, if the noise persists after lubrication, it could indicate worn-out rollers or a misaligned track, which will need professional attention.
- Grinding or Scraping: A grinding noise, particularly one accompanied by the sound of metal scraping, is a more serious concern. This can point to an issue with the opener’s chain or belt, or it might mean a roller is wearing out and grinding against the track. A scraping sound can also be a sign of a misaligned door, where the panels are rubbing against the door frame. These issues can cause significant damage and should not be ignored.
- Rattling: A rattling sound often suggests that a nut, bolt, or screw has come loose from the constant vibration of the door’s operation. This is a crucial sound to heed. Left unchecked, a loose part can fall out completely, leading to a roller jumping the track, a hinge snapping, or a support bracket failing.
- Thumping or Banging: A periodic thumping noise as the door moves could signal a failing opener motor. If the thumping is loud and sharp, it could mean that the chain or belt is slapping against the rail. The most alarming of all sounds is a loud, gunshot-like bang. This almost always indicates a broken torsion spring, which stores immense energy and can be extremely dangerous. If you hear this, stop using the door immediately and call a professional.
- Straining or Humming: If your door struggles to open or close, and you hear a low hum or straining sound from the motor, it’s a sign that the opener is under stress. This could be due to a lack of lubrication, a door that is out of balance, or a motor that is on its last legs. A humming from the motor without any door movement usually indicates a stripped gear or a power issue.
The Visual Inspection Checklist: A Proactive Walk-Through
Regular visual inspections can catch problems before they become audible. A thorough inspection should be a part of your annual home maintenance routine. It’s a simple process that can save you a world of trouble.
1. Disconnect the Opener and Check the Balance: Before you do anything else, you must disconnect the door from the opener. Pull the red emergency release cord. This allows you to test the door’s balance, which is vital to the entire system’s health. A properly balanced door should be easy to lift by hand and should stay in place when you let go at any point, especially midway. If the door feels heavy, drifts downward, or slams shut, it’s out of balance. This is a sign of a spring problem and requires a professional. Never attempt to adjust springs yourself, as they are under extreme tension.
2. Examine the Tracks and Rollers: The tracks should be free of debris and perfectly aligned. Look for any bends, dents, or gaps between the track and the wall. The rollers, which guide the door along the tracks, should spin freely and smoothly. Check for signs of wear such as chips, cracks, or flat spots. Also, inspect the hardware—hinges, bolts, and screws—for any looseness.
3. Inspect the Springs and Cables: Torsion springs are located on a shaft above the door. Extension springs run parallel to the horizontal tracks. Look for any rust, gaps between the coils, or visible damage. Next, inspect the lifting cables that attach to the bottom of the door. Look for any fraying, broken strands, or rust. If you see any signs of wear, do not use the door. These components are under high tension and can be very dangerous if they snap.
4. Test the Safety Features: Modern garage doors have two critical safety features you must test regularly.
- The Auto-Reverse Mechanism: Place a solid object, such as a roll of paper towels or a 2×4 piece of wood, on the ground under the door. Use your remote or wall button to close the door. When the door touches the object, it should immediately stop and reverse. If it doesn’t, the auto-reverse force is set too high and needs adjustment by a professional.
- The Photo-Eye Sensors: These are the small sensors located on either side of the door, usually about six inches off the ground. While the door is closing, wave your hand or foot in front of one of the sensors. The door should immediately stop. If it continues to close, the sensors are misaligned or malfunctioning. Check for any dirt, cobwebs, or debris blocking the beam, and ensure the sensors are aligned and their indicator lights are on.
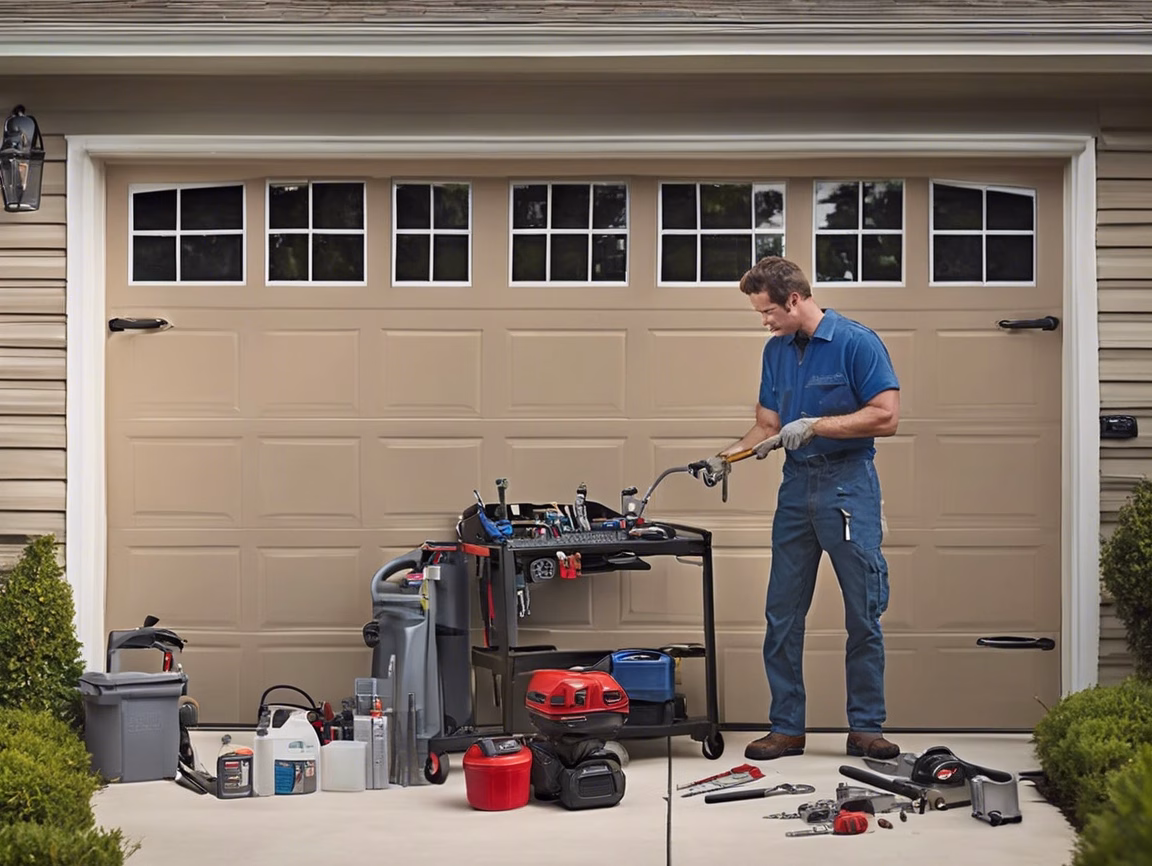
The DIY Maintenance Toolkit: Simple Tasks, Big Impact
Introducing the Genie QuietLift Connect, the pinnacle of smart garage solutions, expertly designed for those who value both intelligence and peace in their home. This WiFi-enabled smart garage door opener features a robust ¾ HPC motor that works seamlessly with a belt drive system, ensuring ultra-quiet operation—ideal for homes where the garage is close to living spaces.

Once you’ve completed your inspection, it’s time for the easy, preventative tasks that will keep your door running smoothly. These are simple but effective steps that can be done with a few common household items.
1. The Right Lubricant: This is the most crucial DIY task, but it requires the right product. Do not use WD-40. It is a degreaser, not a long-lasting lubricant, and will attract dirt and dust, creating a gummy buildup that can worsen problems. Instead, use a silicone-based spray lubricant or a white lithium grease. These are specifically designed for garage door components, won’t attract debris, and will hold up to temperature fluctuations.
2. Where to Lubricate:
- Springs and Hinges: Apply a thin layer of lubricant to the torsion or extension springs. Lubricate the hinge pins where they pivot, spraying on the part that rotates.
- Rollers: For rollers with exposed ball bearings (typically metal rollers), spray the lubricant directly into the bearings. For nylon rollers, you only need to lubricate the stems. Avoid spraying the rollers themselves.
- Opener Chain/Belt: If you have a chain-drive opener, apply a small amount of white lithium grease or a specialized chain lubricant to the entire length of the chain. For belt-drive openers, lubrication is generally not needed.
- Avoid the Tracks: Never lubricate the tracks themselves. This can cause the rollers to slip, leading to an unbalanced door. The rollers are designed to glide, not slide, along the track.
3. Tighten the Hardware: With a wrench and a socket set, go over all the visible bolts and nuts on the garage door. The constant vibration of the door can cause them to loosen over time. Simply tighten any that feel loose, but be careful not to overtighten, which can strip the threads or damage the components. Pay special attention to the hinges and the brackets that hold the tracks in place.
4. Clean the Door and Tracks: A clean door is a healthy door. Dirt and grime can accumulate on the tracks, interfering with the rollers. Use a simple rag to wipe down the inside of the tracks. Wash the exterior of the door with a mild detergent and water to remove dirt, dust, and any salt or chemicals that may have accumulated, which can lead to rust.
Knowing When to Call a Pro: Safety First, Always
While these DIY tasks can address many common issues, some problems are simply too dangerous to tackle on your own. A professional technician has the tools, training, and experience to handle these issues safely. Always call a professional for:
- Broken or Damaged Springs: Torsion springs are under thousands of pounds of tension. A broken spring can release a massive amount of energy, and attempting to replace one without the proper tools and knowledge can result in serious injury or death. This is the single most important rule of garage door maintenance: never attempt to fix a spring yourself.
- Bent or Misaligned Tracks: A bent or misaligned track is not a DIY fix. It can cause the door to bind, creating uneven stress on the opener and potentially causing the door to jump the track and fall. A professional can realign and adjust the tracks correctly.
- Frayed or Broken Cables: Like springs, the lifting cables are under high tension. If a cable is frayed, it’s a sign that it’s close to snapping. A professional has the expertise to replace these safely.
- Malfunctioning Opener: If your opener motor is humming, clicking, or struggling, it’s time for a professional diagnosis. They can determine if a component needs replacement, or if the entire opener needs to be upgraded.
A Simple Maintenance Schedule for Longevity
To keep your garage door in peak condition, adopt a simple maintenance schedule.
- Quarterly (Every 3 Months): Visually and audibly inspect the door. Listen for any new noises and look for loose hardware.
- Bi-Annually (Every 6 Months): Perform a full inspection, including the balance test. Lubricate all moving parts using the correct lubricant. Tighten any loose nuts and bolts.
- Annually (Every 12 Months): Perform all bi-annual tasks. Additionally, test the auto-reverse and photo-eye safety features. Check the weatherstripping for tears or damage and replace it if needed.
Your garage door is more than just a convenience; it’s a critical part of your home’s security and safety. By taking a few moments each year to inspect and care for it, you can avoid costly and dangerous breakdowns. Don’t wait for a noise to become a problem. A little proactive maintenance goes a long way in ensuring your door’s longevity and your family’s safety.