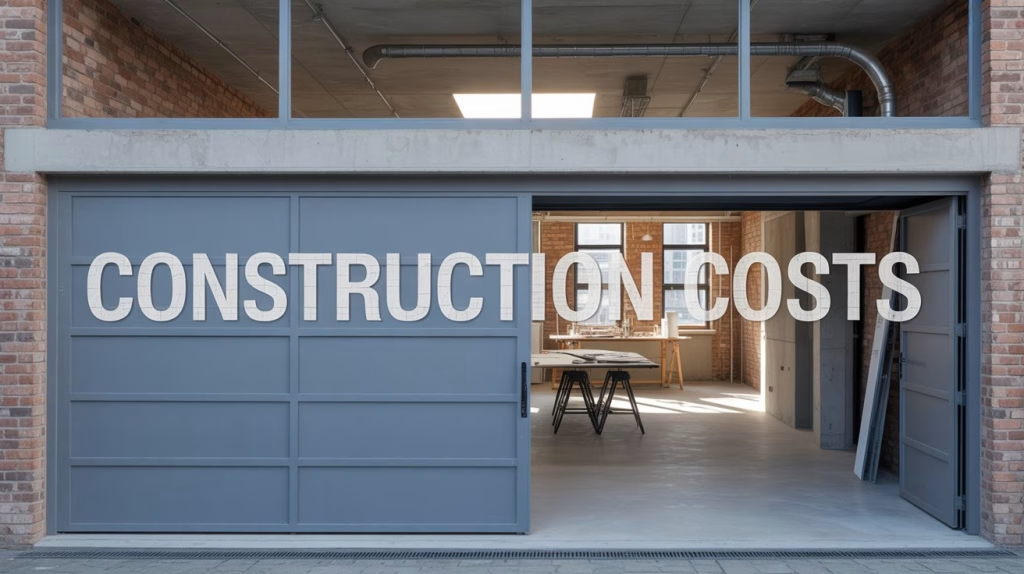
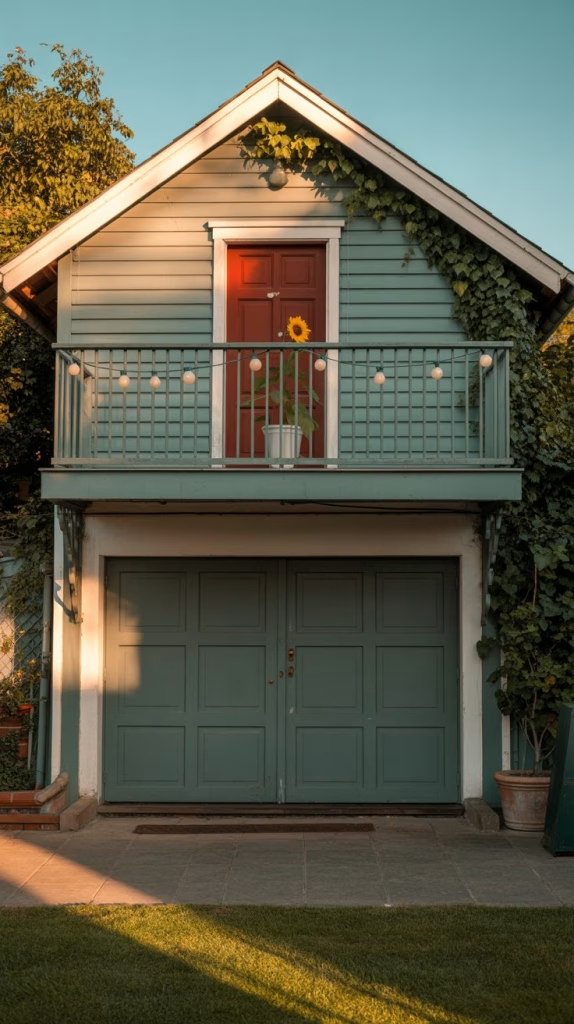
The Big Question: How Much Does It Cost? (The Financial Landscape)
This is often the first, and most daunting, question homeowners ask when considering a garage studio. There’s no single, easy answer, as costs can fluctuate wildly based on numerous factors. However, by breaking down the various components, you can gain a clearer understanding and prepare a realistic budget.
Breaking Down the Costs: Average Ranges and Influencing Factors
The cost of building a studio above a garage typically ranges from $80,000 to $200,000 or more, but these figures are highly dependent on the specifics of your project. Let’s explore the key cost drivers:
- 1. Foundation/Structural Reinforcement: This is often the most critical and potentially expensive initial phase. Your existing garage was likely built to support only the weight of a roof, not an entire second story. A structural engineer must assess the current foundation, footings, and walls.
- Cost Factor: If significant reinforcement is needed, such as new footings, thickening existing walls, or adding steel beams, this can easily add $10,000 to $40,000+ to the project. In some cases, if the existing structure is too weak, it might even require tearing down and rebuilding the garage foundation, which dramatically increases costs.
- Cost-Saving Tip: A thorough pre-assessment by an engineer can identify potential issues early, allowing for more accurate budgeting and design adjustments to minimize costly surprises.
- 2. Framing and Shell Construction: This involves building the walls, subflooring, and roof structure for your new studio.
- Cost Factor: Expect to allocate $20,000 to $50,000 for this phase, depending on the size and complexity of the design. This includes lumber, sheathing, and labor for framing.
- 3. Exterior Finishes: Matching the new addition to your existing home’s aesthetic is crucial for curb appeal and property value. This includes siding, windows, and exterior doors.
- Cost Factor: Costs can range from $10,000 to $30,000+. Matching existing high-end materials (e.g., brick, stone) will be more expensive than standard vinyl siding. The number and quality of windows also play a big role.
- Cost-Saving Tip: Opt for standard-sized windows and doors, which are typically less expensive than custom sizes. Consider materials that offer a good balance of durability and cost-effectiveness.
- 4. Roofing: Tying the new studio roof into your existing garage roof or creating an entirely new, independent roof structure.
- Cost Factor: This can be $5,000 to $15,000+, depending on the size, pitch, and materials chosen (e.g., asphalt shingles are more economical than metal or tile).
- 5. Utilities (The Big Ticket Items): This is where costs can quickly escalate due to the specialized labor and materials involved in extending services.
- Plumbing: Essential for a bathroom and kitchenette. This involves bringing water supply and waste lines up to the second story and connecting them to existing main lines.
- Cost Factor: Expect $10,000 to $25,000+, especially if you need to run new lines a significant distance or upgrade your existing main line capacity.
- Electrical: Wiring for lighting, outlets, appliances, and potentially a separate sub-panel.
- Cost Factor: $8,000 to $20,000+. The cost depends on the size of the unit, the number of circuits required, and whether your existing electrical panel can handle the increased load or needs an upgrade.
- HVAC (Heating, Ventilation, and Air Conditioning): Providing comfortable climate control.
- Cost Factor: $5,000 to $15,000+. Ductless mini-split systems are often a cost-effective and energy-efficient solution for smaller ADUs, as they don’t require extensive ductwork like extending a central air system would.
- Cost-Saving Tip (Utilities): Design the bathroom and kitchenette to share a “wet wall” where possible. This minimizes the amount of new plumbing runs, significantly reducing labor and material costs. Research energy-efficient mini-split systems for HVAC, which are generally easier and cheaper to install than extending your main house’s HVAC.
- Plumbing: Essential for a bathroom and kitchenette. This involves bringing water supply and waste lines up to the second story and connecting them to existing main lines.
- 6. Interior Finishes: This is where the studio starts to feel like a home – drywall, flooring, paint, trim, and fixtures.
- Cost Factor: This highly variable category can range from $15,000 to $40,000+, depending on the quality of materials.
- Drywall and paint: $5,000 – $10,000
- Flooring (LVP, laminate, engineered wood vs. hardwood): $3,000 – $10,000+
- Kitchenette cabinets, countertops, and basic appliances: $4,000 – $15,000+
- Bathroom fixtures (toilet, vanity, shower): $2,000 – $8,000+
- Lighting fixtures, outlets, switches: $1,000 – $5,000+
- Cost-Saving Tip: Choose durable, mid-range finishes that offer good value without breaking the bank. Explore affordable but attractive options like luxury vinyl plank (LVP) flooring, stock cabinetry, and standard light fixtures. Consider painting yourself if you’re comfortable with DIY.
- Cost Factor: This highly variable category can range from $15,000 to $40,000+, depending on the quality of materials.
- 7. Insulation: Crucial for energy efficiency, comfort, and soundproofing, especially for a living space above a garage.
- Cost Factor: $2,000 to $5,000+, depending on the type (batt, spray foam) and R-value required by code.
- 8. Stairs and Entryway: How will occupants access the studio? This can be an external staircase or an internal connection to the main house.
- Cost Factor: An external staircase can range from $3,000 to $10,000+ depending on materials (wood, composite, metal) and complexity. An internal connection might involve more extensive renovations to the existing house, potentially costing more.
- Cost-Saving Tip: A simpler, straight run staircase is generally cheaper than a custom-designed L-shape or spiral staircase.
- 9. Permits and Fees: Do NOT underestimate these! Architectural plans, engineering reports, city/county building permits, utility connection fees, and inspection costs are mandatory.
- Cost Factor: These can collectively range from $5,000 to $20,000+, varying significantly by municipality. Some areas have higher fees or require more extensive studies (e.g., geological reports).
- Cost-Saving Tip: While you can’t avoid these fees, having clear, comprehensive plans submitted correctly the first time can prevent costly delays and re-submission fees.
- 10. Contingency Fund: This is perhaps the most important budget line item. Unexpected issues will arise.
- Cost Factor: Always allocate 10-20% of your total project budget as a contingency. For a $150,000 project, this means an extra $15,000 to $30,000. Ignoring this can lead to stress, project halts, or cutting corners later.
Cost Variability Factors:
Beyond the individual line items, several overarching factors influence the final price tag:
- Location: Construction costs (labor and materials) vary dramatically across different regions, states, and even within different cities of the same state. Urban areas generally have higher costs than rural ones.
- Size and Complexity of the Studio: A larger studio or one with intricate architectural details (e.g., dormers, balconies, complex rooflines) will always cost more than a simple, rectangular design.
- Quality of Materials and Finishes: High-end finishes (hardwood floors, custom cabinetry, designer fixtures) will push costs much higher than standard-grade materials.
- DIY vs. Professional Labor: While doing some work yourself can save money, it’s crucial to know your limits. Structural, electrical, and plumbing work must be done by licensed professionals, both for safety and code compliance. Incorrect DIY work can lead to expensive fixes or even legal issues down the line.
- Existing Garage Condition: A garage that’s already in excellent structural shape with a robust foundation will require less initial investment than one that needs significant repair or upgrades before building can even begin.
Understanding these cost components and influencing factors is the first step toward creating a realistic budget and avoiding unpleasant surprises as you embark on your garage studio journey.
The Planning & Design Phase: More Than Just Four Walls
Once you have a grasp of the potential costs, the next step is to translate your vision into a concrete plan. This phase is paramount; thorough planning here will save you significant time, money, and headaches during construction. It’s about more than just sketching out a room – it’s about ensuring feasibility, compliance, and ultimately, creating a space that truly serves its purpose.
Feasibility Study & Initial Assessment
Before you even think about swinging a hammer, you need to confirm that building a studio above your garage is even possible, let alone practical.
- Zoning and Local Ordinances: This is your absolute first stop. Every city, county, and often even homeowners’ association (HOA) has specific rules regarding Accessory Dwelling Units (ADUs). These can dictate:
- Permitted Use: Is an ADU even allowed on your property?
- Setbacks: How close can the structure be to property lines?
- Height Limits: Can you even add a second story without exceeding the maximum allowable building height?
- Size Restrictions: Maximum square footage for ADUs.
- Parking Requirements: Do you need to provide additional off-street parking for the ADU?
- Owner Occupancy: Some localities require the owner to live on the property (either in the main house or the ADU).
- Utility Connections: Specific requirements for water, sewer, and electrical hookups.
- Actionable Tip: Visit your local planning department’s website or office. Many now have dedicated ADU guides or staff available to answer preliminary questions. Don’t rely on hearsay; get the official rules.
- Structural Assessment: This is a non-negotiable step. Your existing garage was not designed to bear the load of a new living space. You must hire a licensed structural engineer to evaluate your existing foundation, garage walls, and framing. They will determine:
- If the existing structure can support the added weight.
- What reinforcements are necessary (e.g., new footings, thicker walls, additional beams, shear wall installation).
- This initial assessment might cost a few hundred to a couple thousand dollars, but it’s an essential investment that can prevent catastrophic failures or costly redesigns later.
- Budget Realism Check: After your initial structural assessment and a clearer picture of local regulations, revisit your preliminary budget. Are your aspirations aligning with your financial reality? This is the time to make adjustments to your scope or material choices before committing to design plans.
Architectural & Engineering Drawings
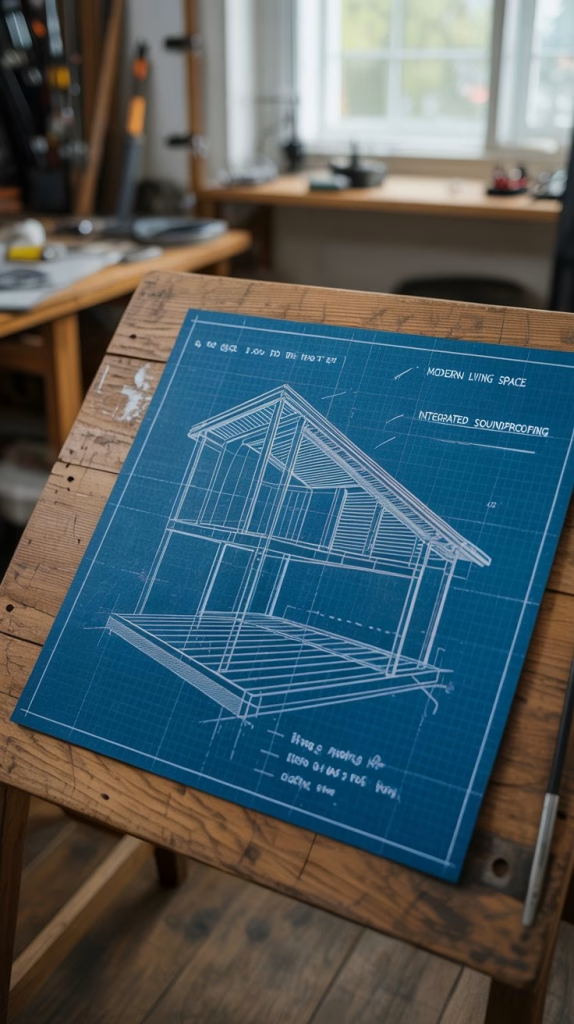
With feasibility confirmed, it’s time to bring your vision to life on paper. Professional plans are not just for permits; they are your blueprint for construction, ensuring clarity, accuracy, and efficiency.
- The Importance of Professional Plans:
- Permit Approval: Local authorities require detailed architectural and structural plans to issue building permits. These plans demonstrate that your project meets all safety, zoning, and building code requirements.
- Clarity for Contractors: Precise drawings minimize misunderstandings and change orders during construction, ensuring everyone is working from the same page.
- Cost Control: Detailed plans allow contractors to provide more accurate bids, helping you manage your budget more effectively.
- Safety and Durability: Engineers ensure the design is structurally sound and safe for long-term use.
- Actionable Tip: Seek out architects or building designers with experience in ADUs or second-story additions. They will be familiar with the common challenges and optimal solutions for this type of project.
- Laying Out the Space: This is where the creative process meets practical application. Consider the primary resident’s needs.
- Open Concept vs. Defined Rooms: An open-concept studio can feel larger and more versatile, ideal for a single person or a couple. Defined areas (e.g., a small, separate bedroom) offer more privacy but may make the space feel smaller.
- Natural Light and Ventilation: Maximize natural light with strategically placed windows. Consider cross-ventilation for airflow. Skylights or dormer windows can dramatically brighten a space but add to costs.
- Entry and Privacy: Will the studio have a separate, external entrance, or will it connect internally to the main house? An external entrance offers more privacy for both parties and is often preferred for rental scenarios.
Designing for Functionality and Comfort

Every square foot in a studio counts. Smart design can make a compact space feel expansive and highly functional.
- Sleeping Area:
- Built-in Beds or Platforms: Can incorporate storage underneath.
- Murphy Beds: Fold away to free up floor space during the day.
- Convertible Sofas/Daybeds: Offer flexibility for sleeping and lounging.
- Strategic Placement: Position the bed to maximize views or create a cozy nook.
- Kitchenette: Unless local codes require a full kitchen for an ADU, a kitchenette can be very practical and cost-effective.
- Essentials: A sink, mini-fridge, and microwave are often sufficient.
- Light Cooking: Consider a single or double induction burner, or a small convection oven, rather than a full range, to save space and reduce electrical load.
- Storage Solutions: Open shelving, compact pantry units, and multi-purpose islands can provide much-needed storage without overwhelming the space.
- Cost-Saving Tip: Opt for smaller, apartment-sized appliances.
- Bathroom: Even in a small studio, a functional bathroom is a must.
- Maximizing Space: A corner sink, wall-mounted toilet, and a walk-in shower (instead of a tub/shower combo) can make a compact bathroom feel larger.
- Layout: Place the bathroom strategically to minimize plumbing runs, ideally on a shared wall with the kitchenette or existing house plumbing.
- Living/Work Area:
- Multi-functional Furniture: Ottomans with storage, nesting tables, and modular seating can adapt to different needs.
- Built-in Desks or Fold-down Tables: Provide workspace without permanently occupying floor space.
- Lighting: Layered lighting (ambient, task, accent) is key to creating a comfortable and flexible atmosphere. Don’t rely on just one overhead light.
- Storage Solutions: This is critical for keeping a studio clutter-free.
- Vertical Space: Tall shelving units, floor-to-ceiling cabinetry.
- Under-bed Storage: Drawers or lift-up mechanisms.
- Wall-mounted Organizers: For clothes, books, and small items.
- Pocket Doors or Sliding Barn Doors: Save space compared to traditional swinging doors.
- Accessibility Considerations: If the studio is for an aging parent or someone with mobility challenges, integrate universal design principles from the start:
- Wider doorways (36 inches).
- No-step entry or ramp.
- Grab bars in the bathroom, curbless shower.
- Lower light switches and higher outlets.
- These considerations are much easier and cheaper to implement during the design phase than as retrofits.
By dedicating ample time and resources to the planning and design phase, you’ll lay a solid groundwork for a successful, code-compliant, and truly valuable garage studio addition. This proactive approach minimizes unforeseen problems and ensures the final result perfectly meets your family’s needs.
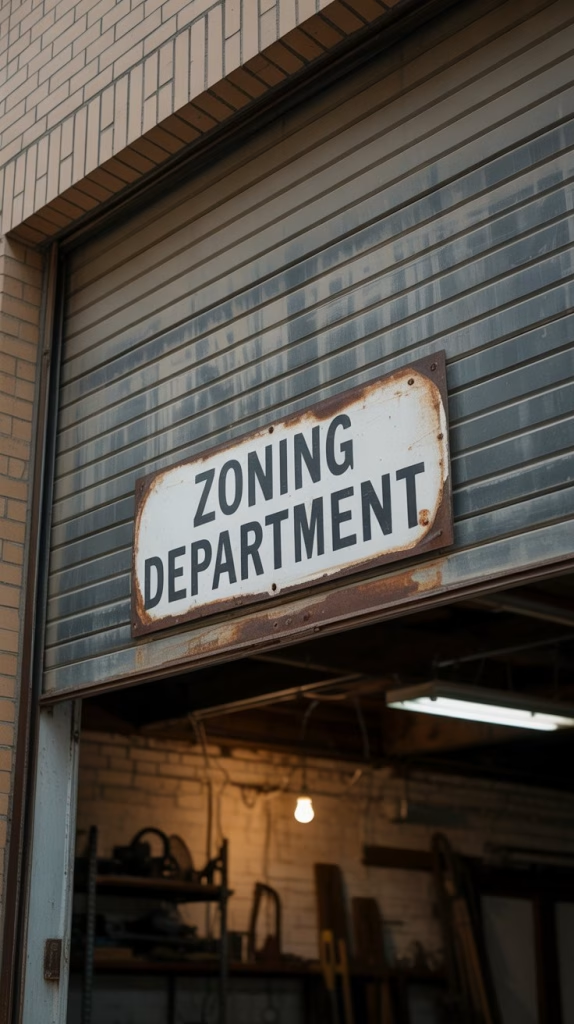
Navigating the Bureaucracy: Permits and Regulations
Even with the best design in hand, your project can stall without proper permits. The permitting process is often cited as one of the most frustrating aspects of any construction project, but it’s absolutely non-negotiable for safety, legality, and ensuring your new studio meets all local building codes. Think of permits not as obstacles, but as safeguards that protect your investment and the well-being of those who will use the space.
Understanding Local ADU Laws
As mentioned in the planning phase, this is your first and most crucial research step. Local ADU (Accessory Dwelling Unit) laws vary wildly from one municipality to another, and they are constantly evolving as cities grapple with housing shortages. What’s permissible in one town might be strictly forbidden in the next.
- Key Areas of Local Law to Investigate:
- Permitted Zones: Is your property zoned to allow an ADU? Some areas restrict them to single-family residential zones, while others may allow them in specific mixed-use zones.
- Owner Occupancy Requirements: Many jurisdictions require the owner of the property to live in either the main house or the ADU. This is a common rule designed to prevent properties from becoming pure rental investments without an owner present.
- Size and Height Restrictions: There will almost certainly be limits on the maximum square footage of the ADU, as well as the overall height of the garage-plus-studio structure. These are often tied to the size of your primary dwelling.
- Setbacks: How far must the structure be from your property lines? These rules protect light, air, and privacy for neighbors.
- Parking Requirements: Will you need to provide additional off-street parking spaces for the ADU? Some areas are waiving or reducing this requirement to encourage ADU development.
- Design Standards: Some communities have aesthetic requirements to ensure the ADU blends seamlessly with the existing neighborhood and primary dwelling.
- Utility Connections: Specific guidelines on how the ADU connects to municipal water, sewer, and electrical grids.
- Impact Fees: Be prepared for potential “impact fees” that cities charge for the additional strain an ADU places on public services like water, sewer, and roads. These can be substantial in some areas.
- How to Get the Information:
- Your Local Planning Department: This is your best resource. Many cities and counties have dedicated ADU sections on their websites with comprehensive guides, FAQs, and even pre-application checklists.
- Call or Visit: Don’t hesitate to call or visit the planning department. Their staff can clarify regulations and guide you through the initial steps.
- Consult Your Architect/Designer: A local architect or designer experienced with ADUs will already be familiar with the nuances of your local regulations and can help navigate them.
The Permitting Process: A Step-by-Step Overview
Once you understand the rules, you’ll embark on the formal permitting journey. While specific steps vary, the general process looks something like this:
- Preliminary Research and Consultation: (As discussed above) Confirm feasibility and understand regulations.
- Architectural and Engineering Plan Development: Work with your professionals to create detailed drawings that comply with all local codes. These plans will include:
- Site plans (showing property lines, existing structures, proposed ADU, setbacks).
- Floor plans.
- Elevations (views of all sides of the structure).
- Cross-sections.
- Structural details (engineered by a licensed structural engineer).
- Mechanical, electrical, and plumbing (MEP) plans.
- Permit Application Submission: Submit your complete set of plans and application forms to the local building department. There will be application fees at this stage.
- Plan Review: City staff (planners, building officials, fire department, public works, etc.) will review your plans for compliance with zoning, building codes, fire safety, and other regulations. This can take several weeks or even months, depending on the municipality’s workload.
- Corrections/Resubmissions: It’s common for plans to be returned with comments requesting corrections or additional information. Address these promptly and resubmit. This back-and-forth is normal, so don’t get discouraged.
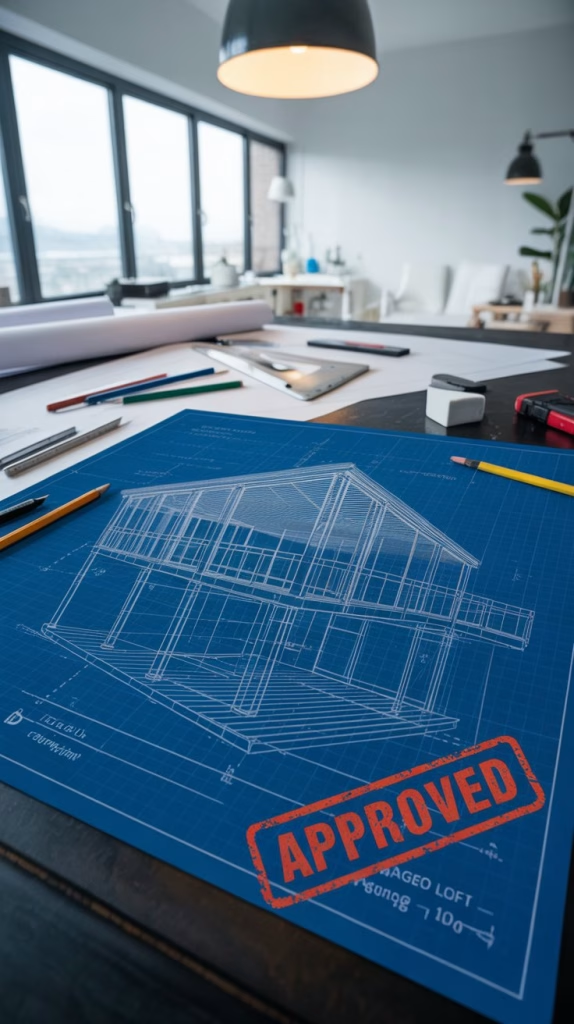
- Permit Issuance: Once your plans are approved and all fees are paid, the building permit will be issued. This permit must be prominently displayed at the construction site.
- Inspections Throughout Construction: As construction progresses, various inspections will be required at key stages. These are crucial to ensure the work is being done according to the approved plans and building codes. Common inspections include:
- Foundation/footing inspection (before concrete pour).
- Framing inspection (before insulation and drywall).
- Rough-in inspections for plumbing, electrical, and HVAC (before walls are closed up).
- Insulation inspection.
- Shear wall inspection.
- Final inspection (before occupancy).
- Actionable Tip: Your contractor should be familiar with the required inspection schedule and be present for them. Do not cover up work (e.g., install drywall) before the required inspection has passed.
- Certificate of Occupancy (C of O): After the final inspection passes, the building department will issue a Certificate of Occupancy. This document certifies that the studio is safe, complete, and legally ready for habitation. You cannot legally move into or rent out the studio until you have this.
Working with Your Contractor
Choosing the right contractor is vital for a smooth permitting process. A good contractor will:
- Be Licensed and Insured: Always verify their license with your state’s contractor board and ensure they carry liability insurance and workers’ compensation.
- Have Experience with ADUs/Additions: Look for contractors with a proven track record of similar projects in your area. They will be familiar with local permitting nuances.
- Understand the Permit Process: They should be able to guide you through the inspection schedule and ensure work is ready for each inspection.
- Handle Subcontractors: Your general contractor will coordinate all necessary subcontractors (plumbers, electricians, HVAC technicians), ensuring they are also licensed and that their work meets code.
The permitting process can feel like a marathon, but patience and thoroughness are your allies. By understanding what’s required and working closely with experienced professionals, you can navigate the bureaucracy successfully and get your dream studio approved for construction.
Construction: From Foundation to Finish
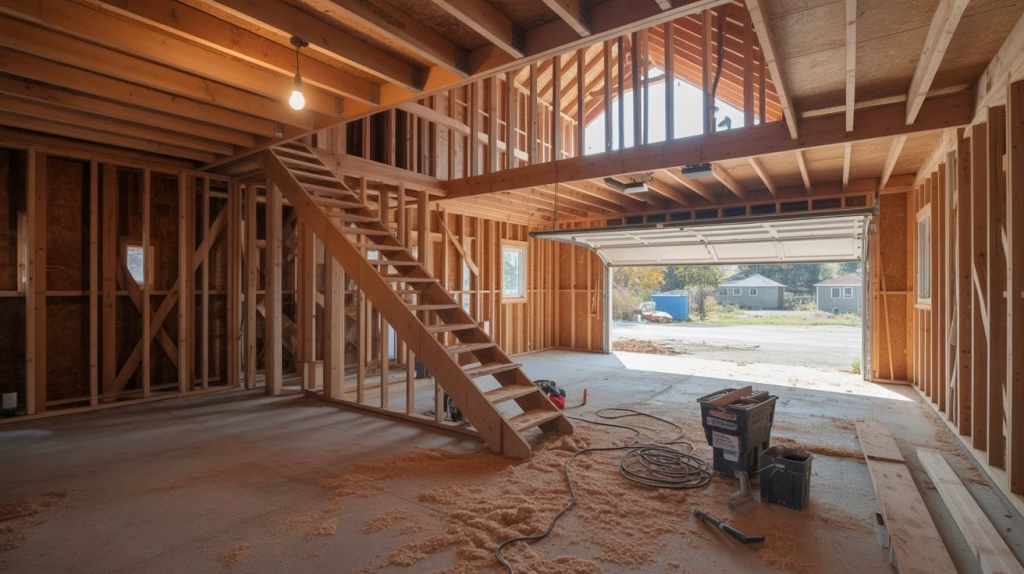
With plans approved and permits in hand, the real transformation begins. The construction phase is where your architectural drawings manifest into a tangible living space. It’s a complex process involving multiple trades, meticulous sequencing, and adherence to building codes. While exciting, it also requires patience and good communication with your chosen builder.
Key Construction Stages
Understanding the typical progression of a garage studio build will help you anticipate what’s next and manage your expectations.
- 1. Demolition and Site Preparation:
- What it involves: This initial step involves removing any existing roof structures on the garage that won’t be part of the new design, clearing out the garage interior, and preparing the site around the garage for construction access. It might also include initial trenching for new utility lines if they need to be brought from the main house or street.
- Your Role: Ensure the garage is completely empty of your belongings. Discuss access routes with your contractor to minimize disruption to your daily life.
- 2. Structural Reinforcement:
- What it involves: This is a foundational and critical step, based on your structural engineer’s recommendations. It can include:
- Pouring new footings around the existing garage foundation to support the added weight.
- Reinforcing existing garage walls with additional studs, plywood shear panels, or even steel beams.
- Installing new headers over garage door openings or windows to support the new upper floor.
- Adding new floor joists for the studio’s subfloor.
- Importance: This ensures the new second story is safely supported and compliant with earthquake and wind load requirements. This stage will be inspected before proceeding.
- What it involves: This is a foundational and critical step, based on your structural engineer’s recommendations. It can include:
- 3. Framing:
- What it involves: Once the structural base is solid, the skeleton of your new studio takes shape. This includes erecting the exterior walls, interior partition walls, and the roof trusses or rafters. Window and door openings are framed at this stage.
- Your Role: This is a great time to walk through the framed space to visualize room sizes, window placements, and verify everything aligns with your plans. Minor adjustments might still be possible, but significant changes will cause delays and add costs.
- 4. Roofing:
- What it involves: Installing the roof decking, underlayment, and final roofing material (shingles, metal, tile) to make the structure watertight. This often involves integrating the new roof with the existing garage roofline, or creating an independent roof for the studio.
- Importance: Protecting the interior from the elements is paramount.
- 5. Exterior Finishes:
- What it involves: Installing house wrap for moisture barrier, then applying the exterior siding (vinyl, fiber cement, stucco, brick), windows, and exterior doors. Fascia, soffits, and gutters are also typically installed.
- Your Role: Confirm the chosen materials and colors match your expectations and the overall aesthetic you planned.
- 6. Rough-ins (Plumbing, Electrical, HVAC):
- What it involves: This is when the crucial internal systems are laid out.
- Plumbing: Water supply lines, drainpipes, and vent pipes for the bathroom and kitchenette are run through the walls, floors, and ceilings.
- Electrical: Wiring for outlets, switches, lights, and any appliances are pulled through wall studs and ceiling joists. The electrical panel may be upgraded or a sub-panel installed.
- HVAC: Ductwork (if using central air) or refrigerant lines (for mini-splits) and condensate drains are installed.
- Importance: All of these “rough-ins” happen before insulation and drywall. Each system will undergo a separate inspection at this stage.
- What it involves: This is when the crucial internal systems are laid out.
- 7. Inspections (Rough-in):
- What it involves: After the rough-ins are complete and before anything is covered up, the building inspector will meticulously examine the plumbing, electrical, and HVAC systems for compliance with code.
- Your Role: Ensure your contractor schedules these inspections promptly. Any deficiencies must be corrected and re-inspected.
- 8. Insulation:
- What it involves: Once rough-in inspections pass, insulation (fiberglass batts, spray foam, rigid foam panels) is installed in walls, ceilings, and floors to ensure energy efficiency and soundproofing.
- Importance: Proper insulation is key for comfort, lower utility bills, and meeting energy code requirements. This stage also typically requires an inspection.
- 9. Drywall:
- What it involves: Drywall sheets are hung on the interior walls and ceilings, taped, mudded, and sanded to create smooth, paintable surfaces.
- Your Role: This is often when the space truly begins to feel like a room. Be aware of dust during this messy process!
- 10. Interior Finishes:
- What it involves: This is the phase that brings the studio to life:
- Painting: Walls, ceilings, and trim.
- Flooring: Installation of chosen flooring (LVP, hardwood, tile, carpet).
- Cabinetry: Installation of kitchenette and bathroom cabinets.
- Countertops: Installation in the kitchenette and bathroom.
- Trim & Doors: Installation of baseboards, door casings, and interior doors.
- Fixture Installation: Plumbing fixtures (sinks, toilets, showers), electrical fixtures (light switches, outlets, light fixtures), and HVAC vents/units.
- Appliances: Hookup of kitchenette appliances.
- Your Role: Final walk-throughs with your contractor to identify any touch-ups or adjustments needed before final payment.
- What it involves: This is the phase that brings the studio to life:
- 11. Final Inspections and Certificate of Occupancy:
- What it involves: Once all construction is complete, a final inspection by the building department is required. They will verify that all work complies with the approved plans and codes.
- Importance: Upon passing, a Certificate of Occupancy (C of O) is issued. This is the official document stating that your garage studio is safe, complete, and legally ready for habitation. Without a C of O, you cannot legally use the space as a dwelling.
Minimizing Disruption: Strategies for Living Through a Construction Project
Living through a renovation, especially one as involved as a second-story addition, can be disruptive. Here are tips to make it more manageable:
- Communicate Regularly: Establish clear lines of communication with your contractor. Set expectations for daily updates, weekly meetings, or email summaries.
- Create a Buffer Zone: Ask your contractor to set up plastic sheeting and dust barriers, especially if the new addition connects to your main home.
- Protect Your Belongings: Cover or remove items in the garage and nearby areas to protect them from dust and debris.
- Plan for Noise: Expect significant noise from tools and machinery, especially during demolition, framing, and drywall installation.
- Temporary Relocation (If Needed): For very sensitive individuals or during particularly disruptive phases, consider staying with family or in temporary accommodation for a few days.
- Be Patient and Flexible: Construction rarely goes exactly to plan. Be prepared for minor delays or unexpected issues, and maintain a positive attitude. Your contractor is working to create a quality product.
Smart Strategies for Cost Savings
Building a studio above your garage is a significant investment, but it doesn’t mean you have to break the bank. With thoughtful planning and strategic choices, you can achieve your dream space without compromising quality. Here are some effective ways to keep costs in check throughout your project.
Strategic Design Choices
The design phase is your first and best opportunity to save money. Decisions made on paper have a ripple effect on materials and labor costs.
- Simple Footprint: Complex designs with multiple bump-outs, unique angles, or irregular shapes require more materials, more specialized labor, and more time, all of which drive up costs. Opting for a simple, rectangular footprint for your studio is generally the most economical choice. This applies to the roofline as well; a simple gable or shed roof is far cheaper to construct than a hip roof or one with multiple dormers.
- Shared Plumbing Walls: This is a golden rule for saving on plumbing costs. Design your kitchenette and bathroom so that their plumbing fixtures (sinks, toilet, shower) are located on a single, shared wall. This minimizes the length of water supply and drain lines, reducing both material and labor expenses significantly. If possible, align this “wet wall” with existing plumbing lines in your main house or garage below for even greater savings.
- Kitchenette vs. Full Kitchen: While an ADU might legally require “cooking facilities,” this doesn’t always mean a full range and oven. A compact kitchenette with a mini-fridge, microwave, sink, and perhaps a portable induction burner can dramatically cut costs compared to installing a full-sized kitchen with an exhaust hood, dedicated oven circuit, and larger cabinetry. This saves on appliance costs, electrical work, and plumbing.
- Standard-Sized Windows and Doors: Custom-sized windows and doors are beautiful but come with a premium price tag. Standard sizes are manufactured in bulk, making them readily available and considerably less expensive. Plan your design around these standard dimensions whenever possible.
- Efficient Layout: A well-designed layout minimizes wasted space and maximizes functionality, meaning you get more usable square footage without necessarily increasing the overall structural size. Think about built-in storage and multi-functional furniture from the outset.
Material Choices
The materials you select for finishes can swing your budget by tens of thousands of dollars. It’s about finding the sweet spot between durability, aesthetics, and cost.
- Mid-Range Finishes: High-end marble countertops, custom cabinetry, and premium hardwood floors are beautiful but very expensive. Durable, attractive, and more affordable alternatives are plentiful:
- Countertops: Laminate, solid surface, or basic quartz are excellent, cost-effective alternatives to granite or high-end quartz.
- Flooring: Luxury vinyl plank (LVP) or laminate flooring can mimic the look of wood or tile for a fraction of the cost, are durable, and often suitable for DIY installation.
- Cabinetry: Stock cabinets or semi-custom options from large retailers are significantly cheaper than fully custom-built units.
- Plumbing Fixtures: Choose reputable brands’ standard lines rather than designer or specialty fixtures.
- Lighting: Look for attractive but basic lighting fixtures from home improvement stores rather than boutique lighting shops.
- Exploring Salvaged or Recycled Materials: For certain elements (like interior doors, some trim, or unique decorative features), architectural salvage yards or online marketplaces can offer unique and cost-effective finds. Crucially, never use salvaged materials for structural components, electrical, or plumbing unless professionally certified as safe and code-compliant. This is typically for aesthetic, non-load-bearing elements only.
- Bulk Purchasing or Contractor Discounts: Your contractor will often get discounts on materials from their suppliers due to volume. Ensure these savings are passed on to you. For larger purchases, asking for bulk discounts directly from suppliers can also yield savings.
DIY Considerations (Where to Safely Save)
While hiring professionals for critical work is essential, there are areas where you can safely contribute your own labor to reduce costs, if you have the skills and time.
- Demolition (Carefully!): You can often save money by handling the interior demolition of the existing garage space yourself, such as removing old shelving, flooring, or non-load-bearing walls. Always consult with your contractor first to ensure you’re removing only what’s safe and necessary.
- Painting: Interior and exterior painting can be a significant labor cost. If you have the patience and a steady hand, doing the painting yourself can save thousands.
- Landscaping: Once the heavy construction is done, you can tackle the final landscaping around the new structure yourself, from planting grass to adding decorative shrubs and pathways.
- Finish Work (Minor): Depending on your skill level, you might be able to assemble flat-pack furniture or cabinetry, install minor trim work, or put up shelves.
- Cleaning: Keeping the job site clean and clearing debris yourself can sometimes reduce the contractor’s labor hours.
- Crucial Warning: Never attempt DIY work on structural elements, electrical wiring, or plumbing lines unless you are a licensed professional in that specific trade. These areas are complex, dangerous, and subject to strict building codes. Incorrect DIY work here can lead to serious safety hazards, costly re-dos, or even void your home insurance. Always err on the side of caution and leave these critical tasks to certified experts.
Phased Construction
In some cases, and with careful planning and communication with your building department, you might be able to break the project into phases to spread out the financial burden.
- Build the Shell First: This involves getting the foundation, framing, roofing, and exterior finished and made watertight. This “dried-in” shell protects the structure and can be less expensive upfront.
- Finish Interior Later: You then complete the interior (insulation, drywall, plumbing, electrical, finishes) in a second phase when funds allow.
- Important Caveat: Check with your local building department if this is permissible. Permits are typically issued for the entire project, and you might need to re-apply or get extensions if construction stretches out too long. This strategy requires meticulous planning and a clear understanding of local regulations.
By combining smart design, sensible material choices, and judicious DIY efforts, you can significantly reduce the overall cost of your garage studio project, making your dream of extra family space a more attainable reality.
The Return on Investment: More Than Just Money
While the upfront cost of building a studio above your garage is substantial, it’s crucial to view this project as a significant investment. The “return” isn’t solely measured in dollars and cents, though the financial benefits are considerable. It also delivers invaluable qualitative returns that enhance your family’s lifestyle and well-being for years to come.
Increased Property Value
One of the most immediate and tangible financial benefits of adding a garage studio (ADU) is the boost to your property’s value. Appraisers and potential buyers increasingly recognize the utility and desirability of these versatile spaces.
- How it Works: An ADU adds legally permitted, habitable square footage to your property. Unlike a simple renovation, it creates a distinct, self-contained unit. This is highly attractive in many real estate markets.
- Appraisal Impact: While the value added isn’t usually dollar-for-dollar what you spend, you can often recoup a significant portion of your investment, sometimes 70-90% or more, especially in high-demand areas. The value added will depend on the quality of the build, the functionality of the space, and local market conditions.
- Market Appeal: Homes with ADUs often stand out in the market. They appeal to a broader range of buyers, including those with multi-generational needs, those seeking passive income, or those desiring a dedicated home office or guest space. This broader appeal can lead to a faster sale and potentially a higher selling price when you eventually decide to move.
Potential Rental Income
If your primary motivation isn’t solely for family use, or if your family’s needs change in the future, a garage studio can become a powerful source of passive rental income.
- Offsetting Mortgage/Expenses: Rental income can significantly offset your mortgage payments, property taxes, or the initial construction costs of the ADU itself.
- Income Stream: In many desirable areas, a well-appointed studio apartment can command competitive rental rates, providing a steady, reliable income stream. Research local rental comparables to get an idea of potential earnings in your area.
- Flexibility: You retain the flexibility to use it for family when needed, and rent it out during other periods, provided your local ADU regulations permit short-term or long-term rentals.
- Cost-Benefit Analysis: Before starting, run a simple calculation: Estimate your total project cost, then research potential monthly rent. This helps you determine a realistic timeline for recouping your investment through rental income.
Flexibility and Future-Proofing Your Home
Beyond the monetary gains, the adaptability of a garage studio is perhaps its greatest long-term return. Your family’s needs will evolve, and this space can evolve with them.
- Multi-Generational Living: This is a major driving force for many homeowners. A private studio offers dignity and independence for aging parents while keeping them close for support and connection.
- Boomerang Kids: For young adults returning home from college or starting their careers, a garage studio provides the perfect blend of family connection and personal autonomy. It prevents “empty nest” syndrome from being prematurely reversed!
- Dedicated Home Office: The rise of remote work has highlighted the need for separate, quiet workspaces. A studio can serve as an ideal, distraction-free home office or creative retreat.
- Guest Suite: Provide unparalleled comfort and privacy for visiting friends and family, elevating their stay from a crowded couch to a luxurious private apartment.
- Personal Sanctuary: Whether it’s a yoga studio, an art studio, a music practice room, a gym, or simply a quiet reading nook, the dedicated space allows for pursuits that might otherwise be squeezed out of a busy main home.
- Future Adaptability: If your needs change, the space can easily transition from one use to another with minimal renovation, ensuring its long-term utility.
Qualitative Returns: The Unmeasurable Benefits
Some of the most profound returns on your investment can’t be quantified on a balance sheet.
- Enhanced Family Relationships: For multi-generational living, it fosters closeness while preserving boundaries, reducing friction, and increasing overall harmony. Parents feel secure, and adult children maintain independence.
- Peace of Mind: Knowing you have a dedicated space for family members in need, or a quiet zone for personal work, brings significant emotional comfort.
- Convenience: No more juggling guest rooms, or trying to find a quiet corner for a video call. Everything is right there on your property.
- Lifestyle Improvement: The added space reduces clutter in the main house, allows for better organization, and can genuinely improve the quality of daily life for everyone in the household.
- Community Connection (if rented): If you choose to rent it out, you can contribute to local housing solutions and potentially connect with new people in your community.
In essence, building a studio above your garage isn’t just a construction project; it’s an investment in your property’s financial future, your family’s comfort, and your overall quality of life. The combination of increased home value, potential income, and unparalleled flexibility makes it a powerful and rewarding endeavor.
Potential Challenges and How to Overcome Them
No construction project, regardless of size, is entirely without its bumps in the road. Building a studio above your garage is a significant undertaking, and it’s wise to anticipate potential challenges. By being prepared and proactive, you can navigate these hurdles smoothly and keep your project on track.
1. Unexpected Structural Issues
Even with a thorough initial structural assessment, sometimes construction reveals hidden problems within an older garage. Rotten wood, unexpected foundation cracks, or inadequate existing framing that wasn’t fully visible can emerge once walls are opened up.
- How to Overcome:
- Prioritize the Structural Engineer: Do not skimp on the initial structural assessment. A highly experienced engineer can often spot potential issues that others might miss.
- Build in Contingency: This cannot be stressed enough. Your 10-20% contingency fund is precisely for these unforeseen structural repairs. Having these funds readily available prevents project halts.
- Open Communication with Contractor: Ensure your contractor immediately communicates any unexpected findings. Discuss the options and their cost implications before proceeding. Sometimes, there are multiple ways to address an issue, and the contractor can help you choose the most cost-effective solution that still meets code.
2. Permit Delays
The permitting process, while essential, can be a source of frustration. Bureaucratic backlogs, requests for additional information, and slow review times are common.
- How to Overcome:
- Start Early: Begin your permit research and application process well in advance of your desired construction start date. Assume it will take longer than you expect.
- Submit Complete & Accurate Plans: Incomplete or incorrect plans are the number one cause of delays. Work with experienced architects and engineers who are familiar with your local jurisdiction’s requirements to ensure your submission is thorough and compliant.
- Follow Up Politely: After submitting, follow up periodically (e.g., weekly or bi-weekly) with the planning department to check on the status. Be polite and persistent.
- Hire Local Expertise: A contractor or architect with extensive experience in your specific city or county will often have established relationships and a better understanding of the local review process, potentially smoothing the way.
3. Contractor Issues
From communication breakdowns to unexpected charges or scheduling conflicts, issues with contractors can be a major source of stress.
- How to Overcome:
- Thorough Vetting: This is your best defense.
- Get Multiple Bids: Don’t just go with the first quote. Get at least three detailed bids.
- Check References: Call past clients and ask specific questions about communication, adherence to budget/timeline, and problem-solving skills.
- Verify Licenses & Insurance: Crucial for your protection.
- Review Portfolio: Look at similar projects they’ve completed.
- Detailed Contract: Ensure your contract is comprehensive, outlining:
- Project scope, materials, and specifications.
- Payment schedule tied to milestones, not just dates.
- Start and estimated completion dates.
- Change order process (how changes are requested, approved, and costed).
- Warranty information.
- Maintain Clear Communication: Schedule regular meetings (weekly) with your contractor. Address concerns promptly and in writing (email is excellent for documentation).
- Walk-Throughs: Regularly walk the site with your contractor to observe progress and address any discrepancies immediately.
- Thorough Vetting: This is your best defense.
4. Budget Overruns
Even with a contingency fund, costs can sometimes creep higher than anticipated due to unexpected issues, material price increases, or scope creep.
- How to Overcome:
- Strict Scope Management: Avoid the temptation to add “just one more thing” once construction has begun. Each change order adds cost and time. Stick to your original plan.
- Value Engineering: If costs are trending high, work with your contractor and designer to “value engineer” certain aspects. This means finding less expensive, but still effective, alternatives for materials or design elements without compromising quality or safety. For example, can you switch from a custom window to a standard size?
- Regular Budget Tracking: Keep a running tally of all expenses, comparing them against your budget. Your contractor should also provide regular financial updates.
- DIY Strategically: As discussed, taking on certain tasks like painting or site clean-up (if you’re capable and have time) can reduce labor costs.
5. Noise and Disruption During Construction
Living through a major construction project on your property can be noisy, dusty, and disruptive to your daily routine.
- How to Overcome:
- Set Expectations: Understand that noise and dust are inevitable. Communicate with family members about what to expect.
- Establish Boundaries: Work with your contractor to define work hours, parking areas for crew, and areas of your property that are off-limits for construction activities.
- Dust Control: Ask your contractor to set up dust barriers (plastic sheeting, zippered doorways) and use dust-reducing tools where possible. Consider professional cleaning post-construction.
- Temporary Living Arrangements: If you’re particularly sensitive to noise or dust, or if a critical phase (like roof removal) is very disruptive, consider a short stay elsewhere if feasible.
- Create a Sanctuary: Designate an area in your main home that is as far removed from the construction zone as possible, where you can retreat for quiet time.
By acknowledging these common challenges and proactively putting strategies in place, you can significantly reduce stress and increase the likelihood of a smooth, successful, and rewarding garage studio build.
Conclusion: Your New Space Awaits
Building a studio above your garage is far more than just a construction project; it’s an investment in your property, your lifestyle, and your family’s future. As we’ve explored, the journey involves careful financial planning, strategic design, navigating permits, overseeing construction, and smartly managing costs. While challenges may arise, with the right approach and a reliable team, they are entirely surmountable.
Imagine the possibilities: a private retreat for aging parents, a vibrant independent space for young adult children, a dedicated and quiet home office, or a welcoming guest suite that makes visitors feel truly at home. Beyond the tangible benefits of added living area and potential rental income, you’re gaining invaluable flexibility and enhancing your property’s long-term appeal and value.
The dream of maximizing your property’s potential is within reach. Take that first step: research your local ADU regulations, consult with a structural engineer, and start sketching out your vision. With careful planning and a clear understanding of the process, you’ll soon be unlocking hidden space and adding immense value to your home and your family’s life. Your new garage studio isn’t just a building; it’s a testament to thoughtful living and a smart investment in tomorrow.