Building your own storage run is a smart home project that saves money and gives stronger results. A recent DIY build used about $600 in lumber and materials, while similar prefab units cost over $1,000 and often use particle board.
We’ll walk through two proven layouts: a floor-plus-countertop example at 88″ tall x 122.5″ wide x 25″ deep with a 25″ x 74″ butcherblock top, and a wall-hung design at 32.5″ x 96″ x 15″ that uses 1/2″ plywood for light weight and efficient sheet use.
This friendly guide covers plans, materials, tools, and safe work habits. You’ll learn how using hardwood plywood, proper hinge choices, and solid mounting keeps cabinets holding heavy tools and running smoothly.
Expect clear sequencing for cuts, shelf adjustability tips, and finishing ideas so your finished cabinet run looks polished and lasts through humidity and daily use.
Project overview and goals for DIY garage storage
Start with realistic goals so the finished run fits your space and works for daily use. A clear brief helps set budget, timeline, and the main performance targets for this diy garage project.
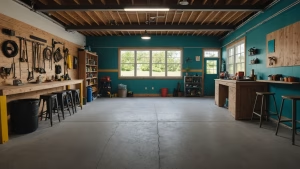
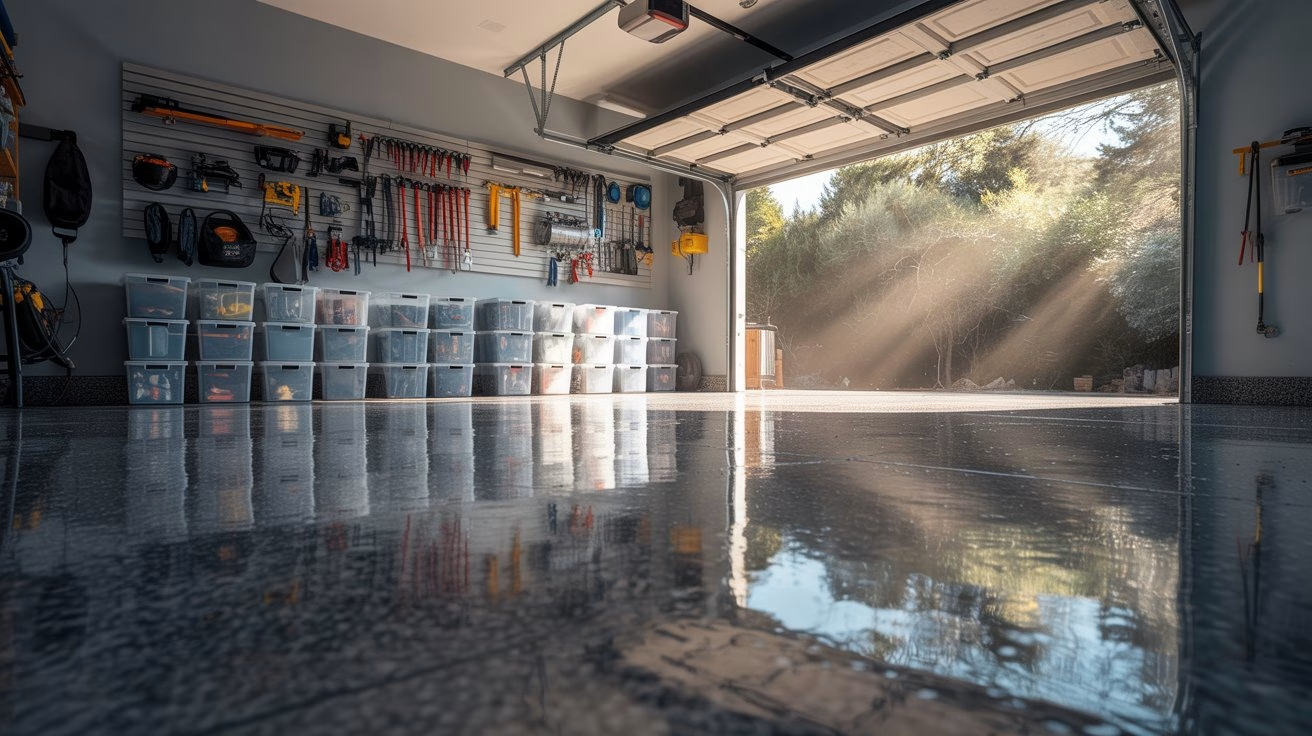
We aim for durable cabinets that handle heavy loads, offer adjustable shelves, and keep the floor clear where practical. Wall-hung units avoid concrete moisture and make sweeping and mopping under the run far easier.
Typical depths range from 16″–24″. Many builders prefer 24″ cabinet boxes paired with a 25″ deep, 74″ long butcherblock top for extra work surface and storage access. Choose cabinet-grade hardwood plywood for strength and stability in changing humidity.
Plan stud locations, outlets, and obstructions before cutting. Set a simple scope: solid carcasses, straight doors, and a safe sequence of steps. Budget and material choices early; they shape cost and final quality.
Pick the best place in the garage for access and clearance around vehicles and doors. Prioritize safety and accuracy at each step so every fastener and seam lines up for a neat, long-lasting result.
Planning your garage cabinet layout and dimensions
A reliable layout starts with careful measurements of wall length, ceiling height, and obstructions like door tracks or light fixtures. Sketch the run on paper and mark stud locations, outlets, and switches so you can plan back panels and cleats without surprises.
For efficient sheet use, consider a 32.5″ W x 96″ H x 15″ D wall-hung module. That 15″ depth yields three panels across a 48″ plywood width and gives shelf lengths of about 31.5″. For a heavier work surface, a base run at 88″ H x 122.5″ W x 25″ D pairs well with a 25″ x 74″ top.
Trim roughly 3/16″ from factory sheet edges before the first rip to remove shipping blemishes and create a true guide edge. Use a table saw or a track saw with a straightedge guide for repeatable, accurate rips that keep all sides consistent.
Plan shelf spacing so adjustable shelves sit where you need them and fixed shelves or stretchers prevent tall cabinet bowing. Finally, sequence your step plan: rip sheets, crosscut parts, dry-fit assemblies, then mount the run. Allow room at ends for trim or reveals for a built-in look.
Tools you’ll need: circular saw, table saw, drill, jigs, and guides
Gathering the right tools upfront saves time and prevents mid-project runs to the shop. A circular saw paired with a reliable guide (Kreg Accu-Cut or Rip-Cut) handles long rips and full sheet crosscuts when you don’t have a cabinet saw.
A table saw makes repeatable rips faster and keeps parts consistent. If you skip that tool, pair the circular saw with a straightedge guide system and steady clamps.
An impact driver and drill/driver cover pocket holes, pilot holes, and fast driving. Keep a 1 3/8″ Forstner bit for concealed hinge cups and a pin-hole center drill for shelf pin layouts.
Key jigs—Kreg 720 pocket hole jig, a concealed hinge jig, and a shelf pin jig—speed production and keep each piece aligned. A brad nailer or stapler holds assemblies while glue cures; a jigsaw cuts toe kicks and notches cleanly.
Don’t skip clamps, a level, speed square, sander, and spare blades and bits. They keep parts square and finishes tidy, which makes the final cabinets fit and function better.
Materials checklist and plywood choices
A careful sheet and hardware list saves money and prevents late trips to the store.
Choose cabinet-grade hardwood plywood—birch, maple, or oak—for the main carcass. For load-bearing parts, plan on six sheets of 3/4″ plywood and two sheets of 1/4″ for backs and toe kicks. Add one sheet of 1/2″ if you want lighter wall-hung cabinet boxes.
Pick a butcherblock board (25″ x 74″) if you want a durable top. Stock 1 1/4″ pocket hole screws and 3″ wood screws for stud mounts. Use staples or brads for trim and wood glue at every joint.
Match hardware to door size: concealed hinges for full-overlay doors and piano hinges for very tall doors. Get shelf pins and a shelf-pin jig for adjustable shelving. Include edge banding for exposed faces.
For French cleats, rip 5/8″ plywood into four-inch strips and bevel at 45°. Keep a few extra strips and boards for cleats, braces, and trim so your final assembly stays square and strong for any diy project.
Cut list strategy to minimize waste
A smart cut list saves sheet material and keeps the build efficient from start to finish. Begin by trimming about 3/16″ from the factory edge so every rip references a true edge for clean, repeatable parts and a precise cut.
.
For 15″ deep modules, rip each 4×8 sheet into three 15″ strips and set aside the remaining ~2.5″ strip for reinforcement or trim. Crosscut eight-foot strips into 31.5″ shelves for 32.5″ wide boxes; this yields minimal waste and consistent shelf depths.
Batch like parts—sides, tops, bottoms, and stretchers—so matching grain and thickness give uniform cabinets. Use a table saw with a fence when possible. If not, use a circular saw with a track guide to keep rips parallel.
Label each piece the moment it leaves the saw. Keep offcuts organized; narrow strips make great shelf edge reinforcements, cleat backers, or small trim pieces. Map large pieces first when cutting tall doors or 24″ sides.
Dry-fit one cabinet before committing to the full run. Leave time in your step schedule for light sanding of edges to reduce splinters and ensure good glue adhesion for every joint.
How to make garage cabinets: building the carcass step by step
Begin each cabinet by laying out the sides and stretchers so every panel lines up before final fastening.
Attach the bottom and top stretchers between the side panels using pocket holes, wood glue, and 1 1/4″ screws. Clamp the assembly and check diagonals with a carpenter’s square until the frame sits square.
Choose a toe kick method: cut notches in each side with a jigsaw or set the unit on a separate 2×4 base. Either approach keeps the face flush with trim and makes leveling easier.
Install a fixed middle shelf in tall units to stop bowing and add a back support rail under the top and middle shelves. These rails give strong anchor points for stud attachment.
Pre-drill pilot holes near panel ends; plywood splits when you skip this. Apply glue on mating faces and use brads or pins to hold joints while driving screws. Add biscuits or dowels if you want precise shelf alignment.
Sand exposed edges before assembly and wipe off glue squeeze-out promptly. Re-check squareness after each step so doors and shelves fit cleanly later.

Base installation and leveling against the wall
A steady foundation makes later steps far easier and more accurate.
Place the base cabinet run so the outside ends match your countertop length — for a 74″ top, set the cabinets exactly 74″ apart. Use shims under corners and behind the back rail to bring each unit level. A long level across the fronts helps keep both boxes in plane.
Anchor each cabinet through the back support rail into wall studs with 3″ wood screws. Confirm stud locations first and pre-drill pilot holes. Drill oversized 3/8″ holes in the top stretchers and fasten the wood top with washers and 1 1/4″ screws so the butcherblock can move seasonally without splitting.
Check that front faces are flush and that the run is plumb and square before final tightening. If the concrete floor is uneven, take extra time with shims — this base is the step every other piece depends on. Set the top in place, confirm overhang and side flushness, then secure from inside through the oversized holes.
Wall mounting with French cleats for safety and strength
Using matching beveled cleats lets a single person lift and lock large carcasses safely in place. Rip 5/8″ plywood into 4″ strips, then bevel both mating faces at 45° so the wall-side and back-side boards interlock cleanly.
Notch the cabinet back about 8 1/2″ wide where the upper cleat will sit. This gives clearance for the cleat strips and keeps the cabinet face tight to the wall ends.
Fasten the wall cleat level into studs with 2 1/2″–3″ cabinet mounting screws. Pre-drill holes to avoid splitting and aim screws into solid framing for maximum hold.
Lift the cabinet so its back cleat hooks over the wall cleat — this step supports the box while you attach a lower cleat or support strip at the rear bottom shelf. Screw through the bottom into that strip to lock the cabinet in place.
Clamp adjacent cabinets, then drive screws through their sides at several points to keep faces flush along the run. Check door clearance and reveals at the ends and adjust by sliding along the cleat if needed.
Leave holes slightly elongated where you expect wood movement; this small allowance keeps the system adjustable while staying secure. The cleat method is a reliable, safe way for a diy installer to mount heavy cabinet runs and set consistent height across the whole wall.
Adjustable shelves, fixed shelves, and reinforcement
Good shelf layout keeps stored gear accessible and prevents sag over time. For a reliable diy run, plan pin rows and at least one fixed center shelf in tall cabinets.
Lay out shelf pin holes with a shelf pin jig or a long pegboard guide so hole rows stay straight on both sides. For 21″ deep shelves, don’t drill the front row farther than 20″ from the back so pins have solid support.
Cut each shelf about 1/16″ narrower than the opening so you can tilt and move a piece between holes without scuffing the side panels. Align the pin rows from the same reference end on both sides so every shelf sits level.
Reinforce fronts with 2.5″ wide plywood strips glued and stapled or brad-nailed for less sag. Use screws through pocket holes or pre-drilled countersinks for any fixed shelf so face panels stay clean.
Space holes consistently so shelves swap between adjacent cabinet boxes. Add edge banding on fronts for a smoother feel, and reinforce load-bearing shelves if you’ll store heavy bins or tools.
Doors, hinges, and hardware: concealed, surface, or piano
Choosing the right door style makes installation and daily use much easier. Full-overlay doors are usually cut about 1/4″ smaller than the cabinet opening so concealed hinges can adjust gaps cleanly.
Tall doors need support. Plan on four concealed hinges per door for taller openings to prevent sagging and keep edges square at the ends.
Use a 1 3/8″ Forstner bit and a concealed hinge jig when drilling hinge cup holes for repeatable depth and placement. A hardboard handle jig also speeds consistent hardware layout across multiple doors.
Consider MDO for smooth painted faces or 3/4″ plywood with edge banding for strength. For very tall or heavy door spans, piano hinges add rigidity and resist twisting.
If a door conflicts with a garage door rail, mount 24″ full-extension drawer slides on backer boards for a sliding upper door workaround. Drive screws carefully and pre-drill pilot holes in plywood faces to avoid stripping.
Add magnetic catches for slight warp correction and simple 3″ ripped trim strips at ends for a clean look and extra strength near hinge zones.
Finishing and trim: paint, gel stain, and door trim strips
Good trim work turns simple boxes into furniture-like pieces you’re proud to use.
Sand all surfaces and exposed edges before finishing. This removes mill marks and helps paint or gel stain lay down evenly.
Seal every side of plywood doors to reduce warp. Apply paint or gel stain, then add a clear coat for extra durability and easier cleaning.
Make door trim from 3″ ripped plywood strips and attach with glue and staples for a clean face detail. Pre-finish toe kicks cut from 1/4″ or 3/4″ plywood so you avoid mess on the run during installation.
If side panels stay visible, skim with drywall compound, sand smooth, and repaint for a furniture-grade finish. Edge band exposed faces before the final coat for a seamless look that resists chipping.
Caulk small gaps at the trim-to-cabinet interface, let finishes cure fully, and keep a small touch-up kit labeled for future nicks. This final step keeps the project looking fresh through heavy use.
Top options and final touches
The right top transforms a run of storage into a true work table for projects and repairs.
A 25″ x 74″ butcherblock is simple, repairable, and ideal for heavy tasks. Attach the wood top from inside the cabinet through oversized holes in the top rails. Use washers and screws so the board can expand and contract without cracking.

Plywood laminations are budget-friendly. Epoxy-coated panels resist stains and chemicals. Stone tops look premium but need strong support and careful placement.
Fit modern handles and magnetic catches as a last step, then fine-tune hinge gaps. Add a narrow trim between base cabinets for a built-in look and hide small seams. Consider a backsplash or a French cleat rail above the top for hanging tools and keeping the work table clear.
Install under-cabinet lighting for an even work surface. Sand and seal any holes or cable grommets so edges stay durable. Finally, load shelves so frequent items stay close and heavy bins sit low for safe access.
Conclusion
Close the project with a final walk-through that locks in fit, finish, and function. Keep your diy plans nearby so small tweaks stay simple and repeatable.
Check French cleats and stud fastenings for a secure wall mount. Wall-hung designs avoid floor moisture and extend the life of the cabinets.
Make sure tall doors use four hinges and seal all edges. Allow countertop wood movement with oversized holes and washers so the top does not split.
This way, each cabinet and cabinet run stays strong, useful, and cost-effective. With careful measuring and the right materials, this diy garage step yields durable storage you can customize again and again.