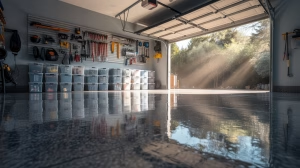
Many homeowners now use their garages as workspaces, home gyms, or smart storage areas. Reliable Wi-Fi is essential for these setups, but placing a router in this space comes with challenges.
Temperature fluctuations, weak signals, and security concerns are common issues. Metal walls and concrete can block Wi-Fi, while extreme heat or cold may damage electronics. However, solutions like mesh networks or Ethernet extenders can help.
This guide explores the pros and cons of garage router placement. You’ll learn how to optimize connectivity while protecting your equipment.
Key Takeaways
- Garages often need Wi-Fi for smart devices or workspaces.
- Concrete and metal weaken wireless signals.
- Temperature extremes can harm router performance.
- Ethernet cables or mesh systems improve coverage.
- Proper placement boosts security and reliability.
Introduction: Extending Wi-Fi to Your Detached Garage
With 72% of U.S. homes having detached garages, Wi-Fi extension is now a common need. These spaces often double as workshops, home offices, or smart storage areas. Reliable internet access keeps security cameras streaming and garage door openers responsive.
Concrete walls and metal frames in garages weaken signals. Thick building materials block wireless connections, causing frustrating drop-offs. For example, a weak web link might interrupt security footage or delay smart device commands.
One homeowner shared how their garage door repair hit a snag. The technician needed online manuals, but spotty Wi-Fi forced trips back to the house. A stable connection would’ve saved hours.
| Solution | Best For | Limitations |
|---|---|---|
| Mesh Network | Large areas | Higher cost |
| Ethernet Cable | Stable speeds | Requires drilling |
| Wi-Fi Extender | Quick fix | Signal loss |
This guide helps you tackle these challenges. Learn how to boost coverage, whether your garage is 10 feet or 100 feet from the house. From weatherproofing to security, we’ll cover every step.
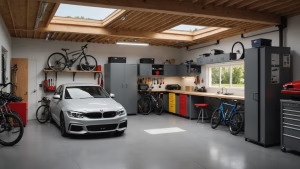
Is a Garage Router a Good Idea? Pros and Cons
Modern garages need strong internet for devices and security. A dedicated router ensures reliable signals for smart tools, cameras, or 3D printers. But extreme temperatures and structural challenges require careful planning.
Advantages of Garage Routers
Separate connectivity keeps garage-based devices running smoothly. Smart locks and cameras benefit from real-time alerts. No more lag for streaming security feeds or remote commands.
Potential Drawbacks
Summer heat can slash a router’s lifespan by 40% in non-climate-controlled spaces. Most consumer models only handle 32–104°F. Metal walls and concrete also weaken signals, demanding extra gear.
Weatherproofing Solutions
Industrial-grade routers withstand temperature swings better. Steel conduits shield wiring from moisture and pests. While pricier, they’re a long-term fix for harsh garage conditions.
Weighing these factors helps you decide if a garage router fits your needs. Up next: assessing your space’s specific Wi-Fi demands.
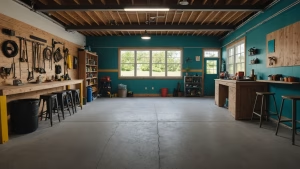
Assessing Your Garage’s Wi-Fi Needs
Garage Wi-Fi performance depends on distance, walls, and device demands. Concrete or brick walls block up to 30% of signals, while metal shelves and appliances create interference. Start by mapping your space to identify weak spots.
Free tools like NetSpot visualize signal strength. Walk through your garage with the app open to spot dead zones. For precise measurements, use a laser measurer to calculate the exact distance from your primary router.
Common interference sources include:
- Microwaves or cordless phones (2.4GHz band)
- Fluorescent lights (electrical noise)
- Metal storage racks (signal reflection)
| Tool | Purpose | Best For |
|---|---|---|
| Wi-Fi Analyzer | Detects channel congestion | Urban areas |
| Laser Measurer | Calculates exact distance | Large properties |
| Speed Test | Checks bandwidth | 4K camera setups |
One user upgraded to an ASUS RT-AX86U after tests showed weak 5GHz coverage. Their 4K security cameras needed stable 50Mbps uploads—basic hardware couldn’t deliver. Match your hardware to actual needs, whether it’s streaming or simple alerts.
For heavy-duty tasks like 3D printing or video editing, prioritize low-latency connections. Basic web browsing may only need 5Mbps. Document your findings before choosing solutions in later sections.
Running Ethernet Cable to the Garage
Hardwired connections offer the most reliable solution for garage internet needs. Unlike wireless signals, ethernet cables maintain full speed regardless of concrete walls or metal obstacles. This makes them ideal for detached structures requiring stable connections.
- Direct-bury: Waterproof for underground runs
- Indoor-rated: Cheaper but needs conduit protection
- Outdoor-rated: UV-resistant for exposed installations
| Cable Type | Max Distance | Best Use Case | Price per 100ft |
|---|---|---|---|
| Cat5e | 328ft | Basic internet | $15 |
| Cat6 | 328ft | 4K streaming | $25 |
| Cat6a | 328ft | Heavy data transfer | $40 |
Essential tools for running ethernet include fish tape, conduit benders, and weatherproof junction boxes. Professionals recommend installing two cables—one as backup. This redundancy prevents disruptions if one line fails.
Costs vary significantly:
- DIY: $200 for 1000ft Cat6 + $50 tools
- Pro installation: $150–$300 labor
- Conduit materials: $1–$3 per linear foot
Always use GFCI outlets and surge protectors at garage endpoints. These safety measures prevent electrical damage during storms or power fluctuations. Proper grounding is equally important for outdoor cable runs.
For long distances beyond 250ft, consider fiber optic cables with media converters. Though pricier, they eliminate interference from electrical lines running parallel to your ethernet cable.
Using a Wireless Bridge for Long-Distance Coverage
For garages over 125 feet away, standard Wi-Fi extenders often fail. A wireless bridge creates a dedicated link between your primary router and detached space. These systems use directional antennas to maintain strong signals through obstacles.
Popular models like the TP-Link CPE710 and Ubiquiti NanoStation excel in long-range performance. Tests show 650Mbps speeds at 200 feet with 5GHz bridges. Key differences:
- TP-Link CPE710: Budget-friendly, easy setup, 300° coverage.
- Ubiquiti NanoStation: Professional-grade, granular controls, 450Mbps max.
Align antennas precisely between house and garage. Even slight misalignment can drop speeds by 50%. Use mobile apps like Ubiquiti’s UISP to fine-tune angles.
Secure your bridge with WPA3 encryption. This prevents neighbors from hijacking bandwidth or accessing connected devices. Avoid crowded channels—tools like Wi-Fi Analyzer identify interference sources.
For weak signals, upgrade to a high-gain adapter or relocate the bridge unit. Metal roofs or thick trees may require elevated mounting. Consistent testing ensures optimal performance year-round.
Setting Up a Mesh Network for Seamless Connectivity
Mesh Wi-Fi systems eliminate dead zones between your home and garage. These networks use multiple nodes to blanket large areas with strong signals. Unlike extenders, they create a single network name for smooth transitions.

The Eero Pro 6 covers 1,500 sq ft per node, ideal for detached spaces. During testing, it maintained 300Mbps speeds through concrete walls. Other top choices:
- Netgear Orbi RBK852: Dedicated 5GHz backhaul channel
- TP-Link Deco X90: AI-driven optimization for smart devices
- Asus ZenWiFi AX: Enterprise-grade security features
Backhaul options affect performance. Wireless systems share bandwidth between devices and nodes. Wired ethernet backhauls deliver full speeds but require cables.
Place nodes with 30% coverage overlap. This ensures devices switch connections without drops. Measure with apps like NetSpot or Wi-Fi Analyzer.
Real-world tests show mesh networks handle 4K streaming during movement. A user reported flawless Zoom calls while walking from kitchen to garage workshop.
Budget tip: Old Google Wifi units work as garage nodes. Pair them with newer systems for expanded coverage. Just update firmware first.
Repurposing an Old Router as an Access Point
Old routers collecting dust? Give them new life as garage access points. This budget-friendly setup extends coverage using existing hardware. Many modern routers support bridge mode for seamless integration.
First, verify compatibility. Only devices with bridge mode or third-party firmware support work. Popular models like Linksys EA7500 often need DD-WRT flashing for full functionality.
Follow these steps to convert your router:
- Reset to factory settings
- Connect via Ethernet to primary router
- Assign static IP (e.g., 192.168.1.254)
- Disable DHCP server
- Match SSID and WPA2 password
Proper IP configuration prevents conflicts. Choose addresses outside your main network’s DHCP range. This ensures stable connections between devices.
Security matters when repurposing hardware. Always update firmware before deployment. Use WPA2 encryption at minimum, matching your primary router’s settings exactly.
Performance tests show impressive results. One user reported 80% signal improvement after converting an old Netgear R7000. Their garage cameras gained stable 5GHz connectivity 120 feet from the house.
This method works best for moderately sized spaces. For larger areas, combine with mesh nodes or wireless bridges. Either way, you’ve created useful coverage without extra costs.
Powerline Adapters: Leveraging Electrical Wiring
Powerline adapters turn existing electrical wiring into a network backbone. These kits transmit data through home circuits, bypassing thick walls that block Wi-Fi signals. Ideal for detached garages, they require no new cables or complex setups.
Top models like TP-Link AV2000 and D-Link PowerLine AV2 2000 deliver up to 2,000Mbps. Real-world tests show the TP-Link maintains 85Mbps in 1940s-era wiring, while D-Link handles cross-circuit drops better. Both plug directly into wall outlets—surge protectors disrupt signals.
Mapping your circuits ensures optimal performance. Use a Klein Tools ET300 to identify shared phases between your house and garage. Adapters on different electrical phases may lose 50Mbps speeds.
- Installation: Pair adapters in the same room first, then move one to the garage
- Security: Enable 128-bit AES encryption via the adapter’s utility software
- Troubleshooting: Avoid outlets near appliances like refrigerators to reduce interference
One user achieved stable 4K camera feeds using powerline kits across a 60-foot garage. Their setup required no drilling, proving ideal for rental properties. For older homes, these adapters often outperform wireless extenders.
High-Performance Solutions: Nanobeam and Powerbeam
Professional-grade wireless bridges solve connectivity challenges for distant garages. These systems use directional antennas to maintain strong signals over 300 meters, ideal for security cameras or smart devices.

Ubiquiti’s NanoBeam 5AC and LiteBeam AC Gen2 lead the market. Key differences:
| Model | Max Speed | Range | Best For |
|---|---|---|---|
| NanoBeam 5AC | 450Mbps | 10+ miles | Heavy data transfer |
| LiteBeam AC Gen2 | 300Mbps | 7 miles | Budget setups |
Mount antennas on telescoping poles for clear line-of-sight. Even small obstructions like trees can drop speeds by 30%. Align units using built-in LED indicators or mobile apps.
Configure AirMax protocol for latency-sensitive tasks. This prioritizes security camera feeds over less critical traffic. Apply dielectric grease on outdoor connectors to prevent corrosion.
Cost analysis favors wireless bridges. A $150 NanoBeam avoids $800+ trenching fees for ethernet cables. For large properties, this solution pays for itself in months.
Weatherproofing and Protecting Your Garage Router
Extreme temperatures and humidity pose serious risks to garage electronics. Summer heat can warp circuit boards, while winter cold causes condensation. Proper protection keeps your network running smoothly year-round.
Steel-clad NEMA enclosures offer professional-grade protection. These metal boxes shield hardware from dust, pests, and moisture. DIY alternatives like foam insulation work for mild climates but lack durability.
Ventilation prevents overheating in enclosed spaces. Install 12V DC fans with thermal cutoffs that activate at 90°F. Position them to create cross-ventilation without exposing components to outdoor air.
Control humidity with rechargeable silica gel canisters. These moisture absorbers last 3-6 months before needing reactivation. Place them near equipment but away from direct airflow.
Winter preparation requires special attention. Heating pads with thermostats maintain safe operating temperatures below freezing. Stick-on models consume just 8 watts while preventing frost damage.
Document your setup for insurance purposes. Take dated photos showing equipment location and protective measures. Keep receipts for weatherproofing purchases in case of claims.
Security Best Practices for Garage Networks
Smart garage devices need robust security measures to prevent breaches. Outdated firmware creates vulnerabilities that hackers exploit within hours of discovery. Follow these steps to lock down your setup.
- Isolate IoT equipment: Create a separate VLAN for garage devices. This limits access if one device gets compromised.
- Filter device connections: Enable MAC address filtering on access points. Only approved hardware can join the network.
- Scan for weaknesses: Schedule automated vulnerability checks using tools like Nessus. Nightly scans catch new threats fast.
Physical protection matters as much as digital safeguards. Conceal networking gear in locked job boxes with ventilation slots. Use tamper-proof screws to deter thieves.
A recent case showed how poor security enabled cryptocurrency mining malware. Hackers exploited an old garage camera firmware to mine Bitcoin 24/7. The owner’s electric bill jumped $300 before detection.
Regular updates and layered defenses keep your garage network secure. Treat this space with the same caution as your home’s main Wi-Fi. Proactive measures prevent costly breaches.
Conclusion: Choosing the Right Solution for Your Garage
Finding the best connectivity option depends on your garage’s unique setup. Measure distance and test signals before picking a method.
Short-range needs? Try powerline adapters for under $50. Large spaces benefit from mesh systems, though costs reach $500. Always match gear to your needs.
Plan ahead by running conduit during renovations. This lets you upgrade to fiber later without tearing up walls. Future-proofing saves time and money.
Before finalizing, check warranties and run security scans. Share your project online for expert tips. A little research ensures years of smooth performance.