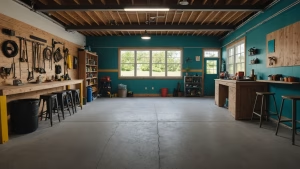
For many homeowners, the garage is a paradox. It’s the largest room in the house dedicated to storage, yet it always seems to be the most cluttered. We enter with the best of intentions, parking our vehicles and storing our tools, but over time, it becomes the catch-all for everything that doesn’t have a place elsewhere. Sports equipment, holiday decorations, old furniture, and forgotten projects pile up, consuming valuable floor space and making it a challenge to even walk from one side to the other.
This is a universal dilemma, but the solution isn’t about building a bigger garage. It’s about a fundamental shift in perspective. Instead of focusing on the limited square footage of the floor, we need to look up. The walls and ceiling of your garage represent a vast, often-untapped resource. By leveraging this vertical real estate, you can reclaim your floor, create a more organized and functional workspace, and find a home for every item without the need for an expensive addition.
This guide will walk you through five smart, actionable strategies to unlock the full potential of your garage’s vertical space. We’ll explore everything from versatile wall systems to clever ceiling solutions, providing both professional and DIY options. Get ready to transform your garage from a chaotic storage unit into an organized, efficient, and inspiring space.
The Overlooked Goldmine: Understanding Vertical Space
Before we dive into the specific solutions, let’s appreciate why vertical organization is so powerful. Reclaiming floor space is the most obvious benefit, but the advantages go far beyond that. When items are stored vertically, they are often more accessible and easier to find. A broom hung on a wall is always within reach, unlike one buried in a corner behind a stack of boxes. This improved accessibility saves time and reduces frustration.
Furthermore, a well-organized vertical system can enhance safety. Tools are no longer tripping hazards on the floor, and hazardous materials can be stored securely out of reach of children or pets. Finally, and perhaps most importantly, a clean, organized garage makes it a more pleasant and functional extension of your home. It can be a place to work on projects, a dedicated home gym, or simply a tidy space to enter and exit each day.
Before You Begin: The Essential Declutter
You wouldn’t try to organize a pile of sand with a shovel. Similarly, you can’t effectively organize your garage without a thorough declutter. This step is non-negotiable and will make every subsequent effort more efficient and successful.
- Empty the Space (If Possible): The ideal scenario is to pull everything out of the garage. This allows you to see the true potential of the space and gives you a blank canvas to work with. If a full clear-out isn’t feasible, work in sections.
- Sort and Categorize: Create four distinct piles or zones: Keep, Donate/Sell, Discard, and Relocate.
- Keep: These are items you use frequently or are essential.
- Donate/Sell: Items in good condition that you no longer need.
- Discard: Broken, irreparable, or unsafe items. Be honest with yourself. If you haven’t used it in two years and it’s not sentimental, it’s likely time to let it go.
- Relocate: Items that belong in another part of the house (e.g., kitchen utensils, laundry supplies).
- Clean the Canvas: Once the clutter is gone, give the garage a deep clean. Sweep the floors, wipe down walls, and clean out any cobwebs. This will make your new organization systems feel even more effective and satisfying.
With a clean slate, you’re ready to start building your new, organized garage.
Smart Way 1: Unleash the Power of Slat Walls and Pegboards
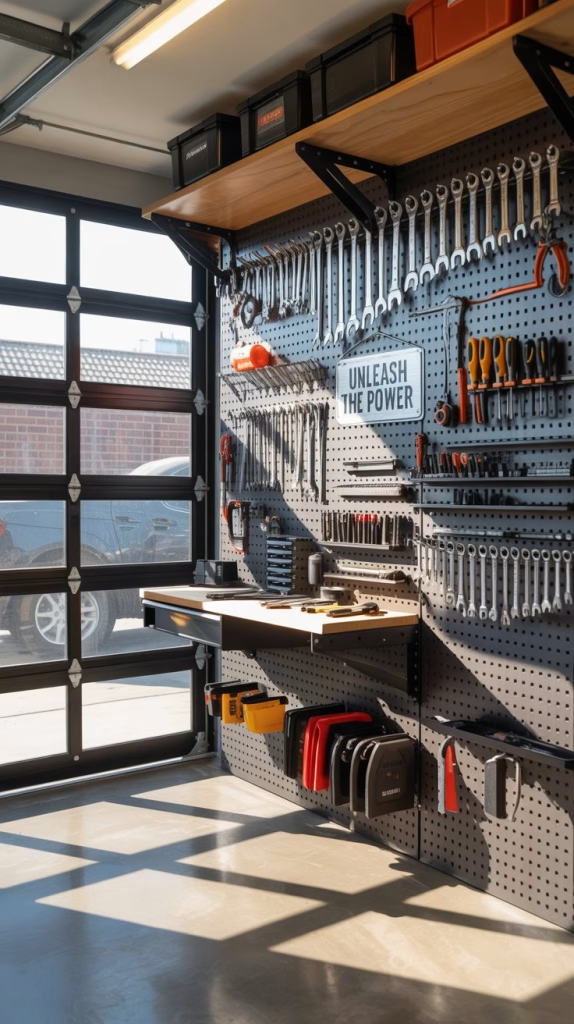
When it comes to flexible, dynamic vertical storage, nothing beats a well-designed wall system. Slat walls and pegboards are the foundational building blocks of a truly organized garage, offering unparalleled versatility and customization.
A pegboard is a classic for a reason. Its grid of small holes allows you to hang a variety of hooks, bins, and holders for hand tools, gardening supplies, and small parts. It’s an incredibly economical and popular choice for a DIY project. You can purchase large sheets of pegboard at any home improvement store and easily mount them to the garage studs. A simple wooden frame around the board can make it look more finished and provide a buffer for hooks. The biggest benefit is how easily you can change the layout as your needs evolve.
Slat walls, on the other hand, are the professional-grade evolution of the pegboard. Made from interlocking panels of durable PVC, wood, or metal, they feature horizontal grooves that accept a wide range of specialized accessories. Think of it as a vertical track system. The accessories—from hooks and shelves to wire baskets and heavy-duty brackets—simply snap into the grooves, making installation and repositioning a breeze.
- DIY vs. Professional:
- DIY: A DIY pegboard system is an affordable weekend project that can instantly improve the organization of your workbench area. You can even find specialized pegboard tool racks and shelves.
- Professional: Professional slat wall systems, while more of an investment, are built to last and can handle significantly more weight. They are an excellent choice for a cohesive, clean look and for storing heavier items like power tools, ladders, or even sports equipment. The extensive range of accessories ensures you can customize the system to your exact needs.
Before & After: Imagine a messy garage wall with a half-dozen tools leaning against it, creating a pile on the floor. Now, picture that same wall covered in a clean slat wall system. The tools are neatly hung on specialized hooks, the gardening gloves are in a small basket, and a few small shelves hold paint cans and cleaning supplies. The floor is now completely clear, and you can see exactly where everything is.
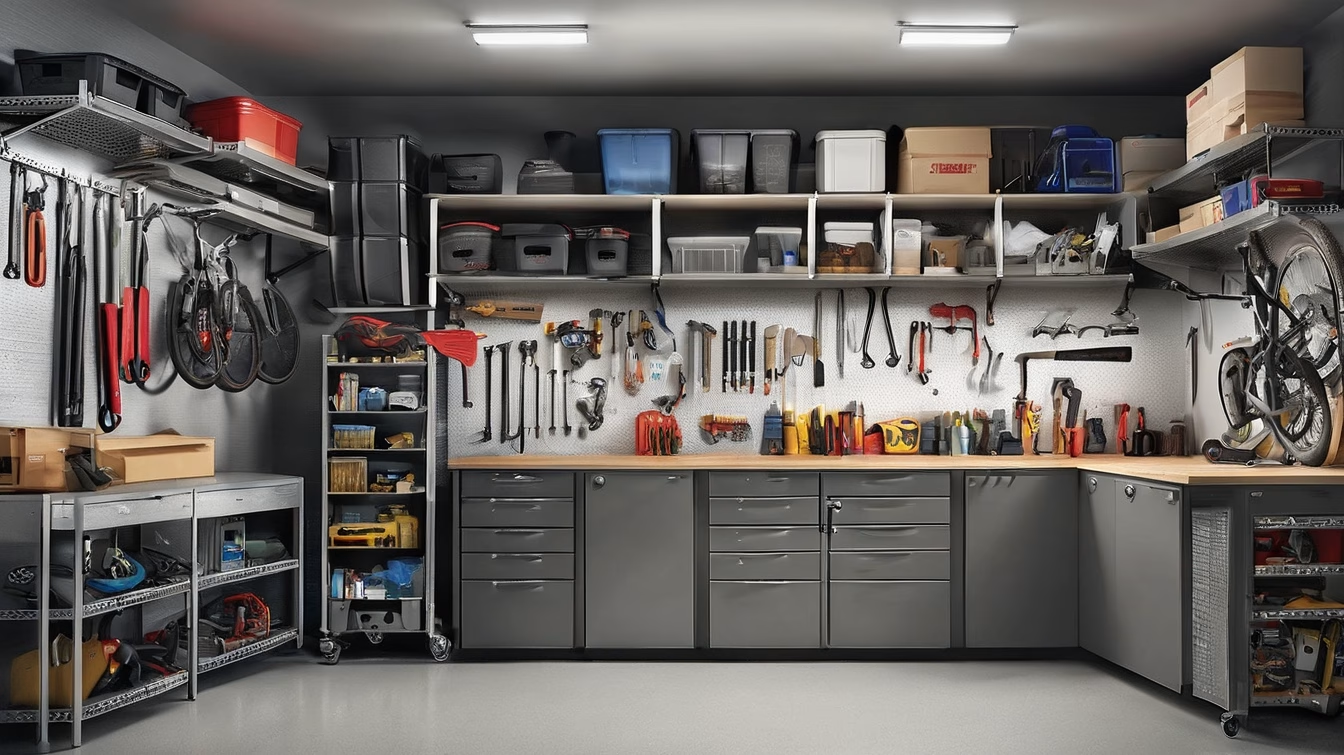
Smart Way 2: Elevate Storage with Overhead Racks and Shelving
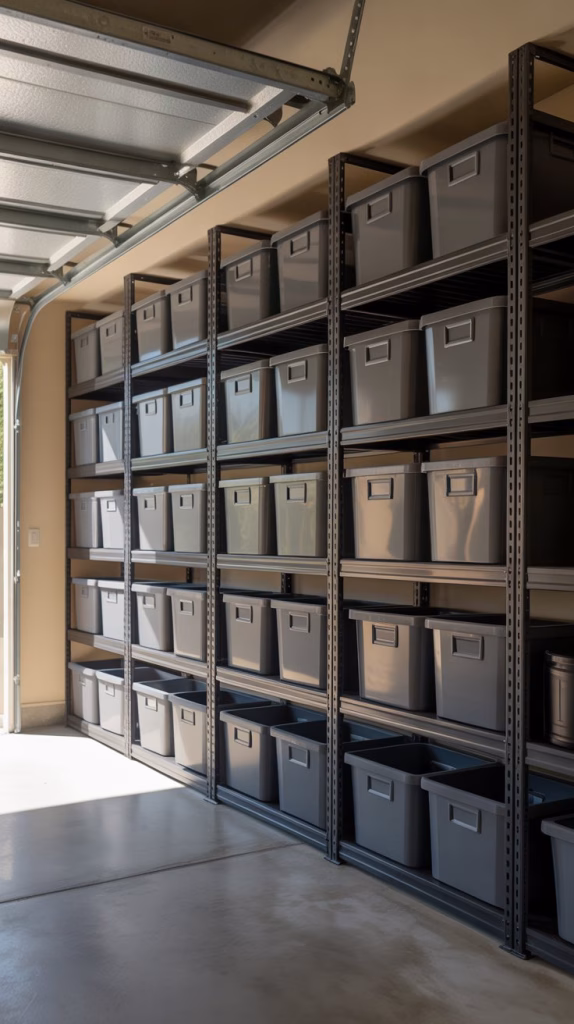
Once you’ve utilized your wall space, look up. The area above your garage doors, as well as the unused space near the ceiling, is a storage goldmine for items you don’t need to access every day. Overhead storage racks are heavy-duty metal shelving units that are securely bolted to the ceiling joists.
These racks are perfect for storing seasonal items like holiday decorations, camping gear, and winter sports equipment. They get bulky, rarely-used items off the floor and into a dedicated space, freeing up valuable real estate for your car or active workspace. The beauty of these systems is their incredible weight capacity—some can hold hundreds of pounds—allowing you to store multiple large plastic totes.
- Types of Overhead Storage:
- Fixed Racks: These are rigid, steel frames that provide a stable platform for your totes and boxes.
- Adjustable Racks: Some systems allow you to adjust the height of the platform, giving you flexibility to accommodate different-sized items.
- DIY Shelves: For those with a knack for woodworking, you can construct simple wooden shelves that are securely anchored to the ceiling joists. This is a cost-effective solution for lighter items.
- Professional Systems: Many companies offer professional installation of commercial-grade racks, ensuring maximum safety and durability.
Safety First: When installing overhead racks, it is absolutely critical to locate and secure the unit to the garage’s ceiling joists, not just the drywall. Always follow the manufacturer’s instructions carefully and respect the specified weight limits. A failure to do so could result in serious damage or injury.
Before & After: Visualize a garage floor cluttered with a dozen cardboard boxes of old photos and Christmas lights. After installing two large overhead racks, those boxes are safely stored above the garage door, neatly organized in clear plastic totes. The floor space that was once a tripping hazard is now completely clear, making the garage feel twice as large.
Smart Way 3: Hang It Up: Wall-Mounted Tool Racks and Cabinets
The workbench is often the centerpiece of a garage, but it’s also a magnet for clutter. Hand tools, power tools, screws, and hardware all seem to accumulate, leaving no room for actual projects. By using wall-mounted racks and cabinets, you can transform your workbench from a disorganized dumping ground into an efficient and functional workspace.
Wall-mounted tool racks come in many forms, each designed for a specific purpose. Garden tool racks, for example, have specialized hooks to hold rakes, shovels, and brooms upright and off the floor. Power tool racks often feature slots to hold drills, saws, and batteries, keeping them charged and ready for use. For smaller metal tools, a simple magnetic strip can be a game-changer, providing quick access to screwdrivers and wrenches.
For a more polished and secure solution, consider wall-mounted cabinets. These can be simple metal or wood enclosures that hide away clutter and protect sensitive equipment from dust and moisture. They are perfect for storing chemicals, valuable tools, or anything you want to keep out of sight and away from children.
- Customization is Key: Instead of just hanging things randomly, group your tools by function. Create a “woodworking zone” with your saws and clamps, and an “automotive zone” with your socket sets and oil filters. This approach not only makes the space look neater but also improves your workflow by keeping related items together.
- DIY vs. Professional:
- DIY: You can easily create a simple wall-mounted tool holder with a few pieces of scrap wood and a drill. French cleats are a fantastic DIY option for creating a customizable, heavy-duty system.
- Professional: Investing in a professional-grade cabinet system will give your garage a clean, finished look and provide long-lasting durability. These systems are often modular, allowing you to add more cabinets or workstations in the future.
Before & After: Picture a workbench with a chaotic mess of tools piled on top. After installing a wall-mounted tool board and a few cabinets, the workbench surface is completely clear, ready for your next project. Each tool has its own designated spot, making it easy to find and return.
Smart Way 4: The Sky’s the Limit: Ceiling Hoists for Bulky Items
Some items are just too big for traditional shelves or wall racks. We’re talking about kayaks, canoes, bicycles, and roof-top cargo boxes. These “big toys” often end up leaning against a wall, taking up valuable floor space and becoming a navigational hazard. The solution is to use the ceiling not just for storage, but as an active parking spot.
Ceiling hoists are pulley systems that allow you to lift and lower large, awkward items with minimal effort. They are a game-changer for anyone who enjoys outdoor activities but struggles to store their gear. A simple manual hoist with a rope and locking mechanism can be installed easily and provides a secure, out-of-the-way home for your bikes or kayaks. For heavier items like a car-top carrier, a motorized lift system can make the process even more effortless.
- Installation is Critical: Like overhead racks, hoists must be securely bolted into the ceiling joists. It is crucial to measure carefully and ensure the hoist is rated for the weight of your item. Always double-check the locking mechanisms to prevent the item from falling.
- Benefits Beyond Storage: A ceiling hoist protects your expensive equipment from damage. A bike suspended safely from the ceiling is far less likely to get scratched or dented than one leaning precariously against a wall. It also makes it easier to get the item on and off your car.
Before & After: Imagine a bicycle and a kayak leaning against the side of your car, forcing you to squeeze past them to get to your workbench. Now, picture them neatly suspended from the ceiling, completely out of the way, and ready to be lowered for your next adventure.
Smart Way 5: Creative Nooks and Crannies: Maximizing Awkward Spaces
Effective organization isn’t just about big systems; it’s about making every inch count. A truly organized garage leverages even the most awkward and overlooked spaces. This is where a little ingenuity can go a long way.
- Corner Shelving: The corners of a garage are often wasted space. Installing a set of corner shelves or a tall, rotating rack can provide a home for paint cans, smaller tools, or cleaning supplies.
- Behind-the-Door Storage: The back of a garage door is a perfect spot for shallow organizers. You can use a pegboard system, hanging bins, or even a specialized door-mounted rack to store small items like bungee cords, extension cords, or spray bottles.
- Vertical Lumber Storage: If you have a passion for woodworking, you know that lumber can be a massive space hog. Building a simple vertical rack against a wall can store sheets of plywood and long boards neatly, keeping them off the floor and in good condition.
- Sports Equipment Organizers: Balls, bats, and rackets often create a jumbled mess. A tall, narrow bin or a specialized rack can hold a dozen balls in the space of a single cabinet. Use a section of PVC pipe mounted to the wall to create a holder for baseball bats or hockey sticks.
These small, smart solutions add up. By tackling these overlooked areas, you create a more efficient and visually appealing space, ensuring that every item has its own home.
The Payoff: A Garage Transformed
By moving beyond the traditional workbench and thinking vertically, you can turn your garage from a chaotic catch-all into a highly functional extension of your home. The five strategies outlined here—utilizing versatile wall systems, elevating with overhead racks, hanging tools on walls, hoisting bulky items, and maximizing every nook and cranny—are the keys to unlocking this transformation.
The benefits are immediate and long-lasting. You’ll find more room for your car, less time searching for lost items, and a sense of calm and order every time you step into the space. The visual evidence of your hard work, the “after” picture of your organized garage, will be a testament to your efforts. It’s a project that delivers a tangible, daily reward, proving that sometimes, the best way to get more space is to simply look up.
Now it’s your turn. Which of these vertical solutions will you tackle first to start your own garage transformation?